

Installing Fake Beams on Ceiling on a Budget can completely change a room without the cost, weight, or hassle of real timber. The smartest approach is usually one of two paths: buy lightweight hollow faux beams that install over wood blocking or build simple box beams from common boards or plywood. Current retailer and manufacturer guidance consistently describes faux beams as hollow, lightweight, and made for easier ceiling installation than solid wood.
- Start With the Beam Option That Matches Your Budget
- Map the Ceiling Before You Buy a Single Beam
- Choose the Lightest Beam That Still Looks Right
- The Budget Install Method That Works Again and Again
- Three Budget-Friendly Install Routes That Actually Make Sense
- The Finishing Details That Make Cheap Beams Look Custom
- Mistakes That Waste Money Fast
- A Practical Final Word
- FAQs That Matter Before You Start
The good news is that you do not need a luxury renovation budget to get the look. What matters most is picking the right beam style for your ceiling, laying everything out carefully, and using a mounting method that is strong but simple. When you do those three things well, even an affordable beam project can look polished and intentional.
Start With the Beam Option That Matches Your Budget
The biggest mistake people make is shopping by appearance first and cost second. For a true budget project, start by deciding whether you want speed, the lowest material cost, or the most custom look. Prefinished hollow beams are fast and clean to install, while DIY wood box beams are often cheaper for smaller rooms because you can build them from basic lumber. Family Handyman notes that one faux beam style can be built from store-bought 1×6 boards without needing a table saw, which lowers the entry barrier for beginners.
Off-the-shelf beam pricing also explains why planning matters. Current Home Depot listings show examples ranging from about $150 for an 8-foot wood faux beam to about $589 for a 24-foot hollow faux beam, with many polyurethane models landing in the few-hundred-dollar range. That does not mean store-bought beams are a bad choice. It just means Fake Beams on Ceiling on a Budget works best when you measure carefully and avoid buying more beam than the room really needs.
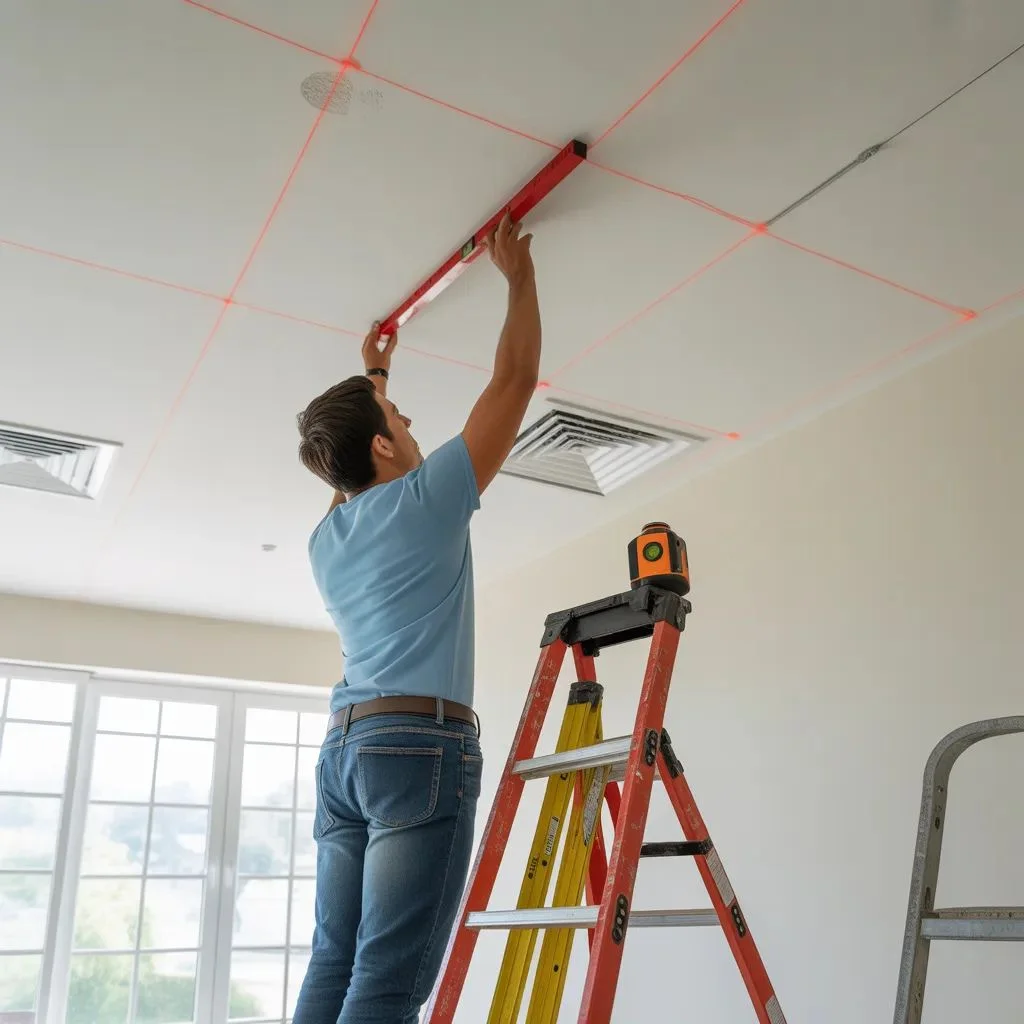
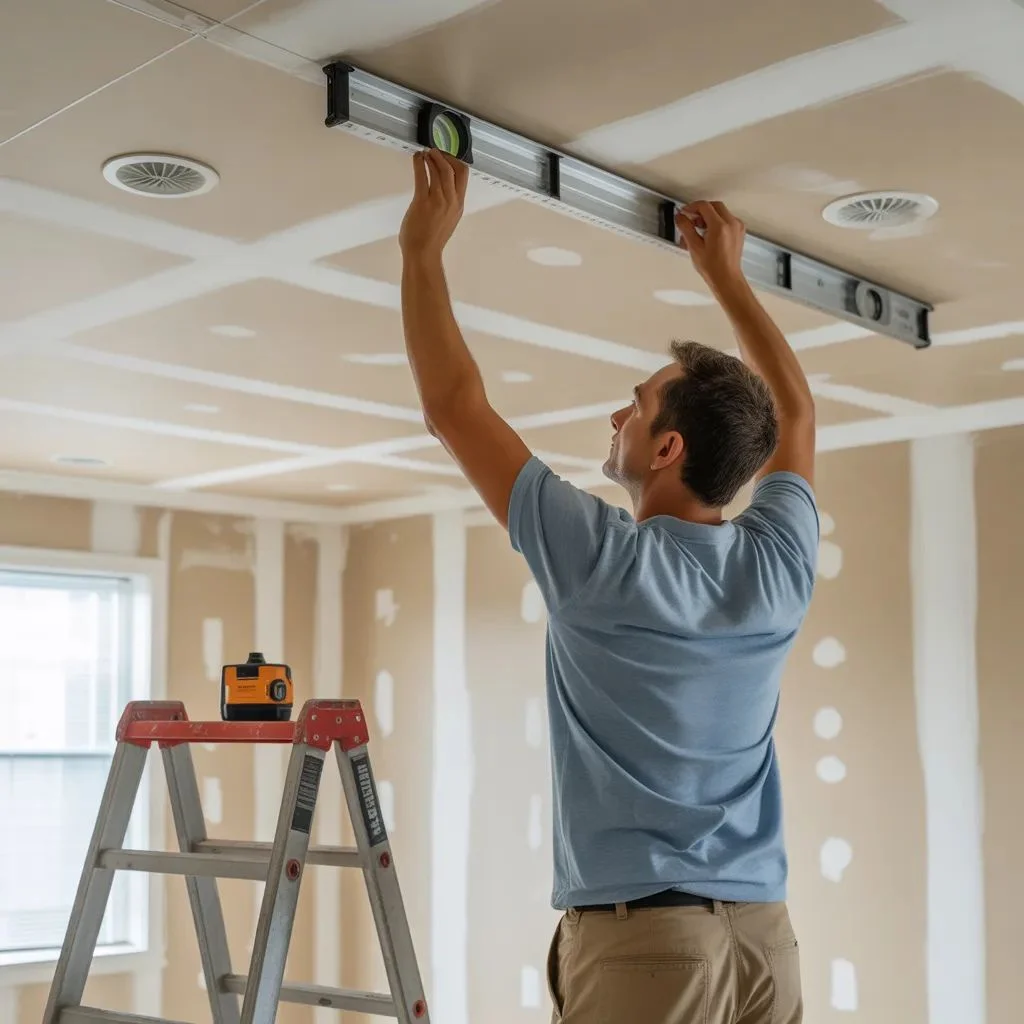
Map the Ceiling Before You Buy a Single Beam
A budget beam job starts on paper, not on a ladder. Lowe’s recommends identifying beam locations, checking room layout, and marking straight, parallel lines with a laser or chalk line before installation. In its decorative ceiling guide, Lowe’s also suggests mapping the ceiling dimensions first and noting obstacles like recessed lights, vents, and corners that are not perfectly square. That planning step saves money because it cuts down on wasted material, bad cuts, and awkward beam placement around fixtures.
This is also the stage where you decide whether the room needs a full beam pattern or just one focal beam. On a tight budget, fewer beams usually look better than a crowded grid. One centered beam over a dining area, kitchen island, or living room sightline can deliver the same visual warmth without multiplying your cost, seams, and labor. That is not in every manufacturer guide, but it is the most practical design move when money is tight.
Choose the Lightest Beam That Still Looks Right
If your goal is value, lightweight hollow beams are usually the safest place to begin. Lowe’s specifically advises using lightweight hollow beams for ceiling mounting to reduce stress on the ceiling, and both Home Depot and Ekena Millwork describe many faux wood beam products as hollow, lightweight, and designed for fast installation. Many of these products are polyurethane, which is one reason they are easier to handle overhead than solid timber.
That matters because ceiling work gets expensive when beams are hard to lift, cut, or support. A lighter beam usually means fewer helpers, less strain during installation, and a simpler mounting system. When you are trying to install Fake Beams on Ceiling on a Budget, that is a real advantage. You are not just saving on materials. You are also saving time, labor, and the chance of messing up drywall during the install.
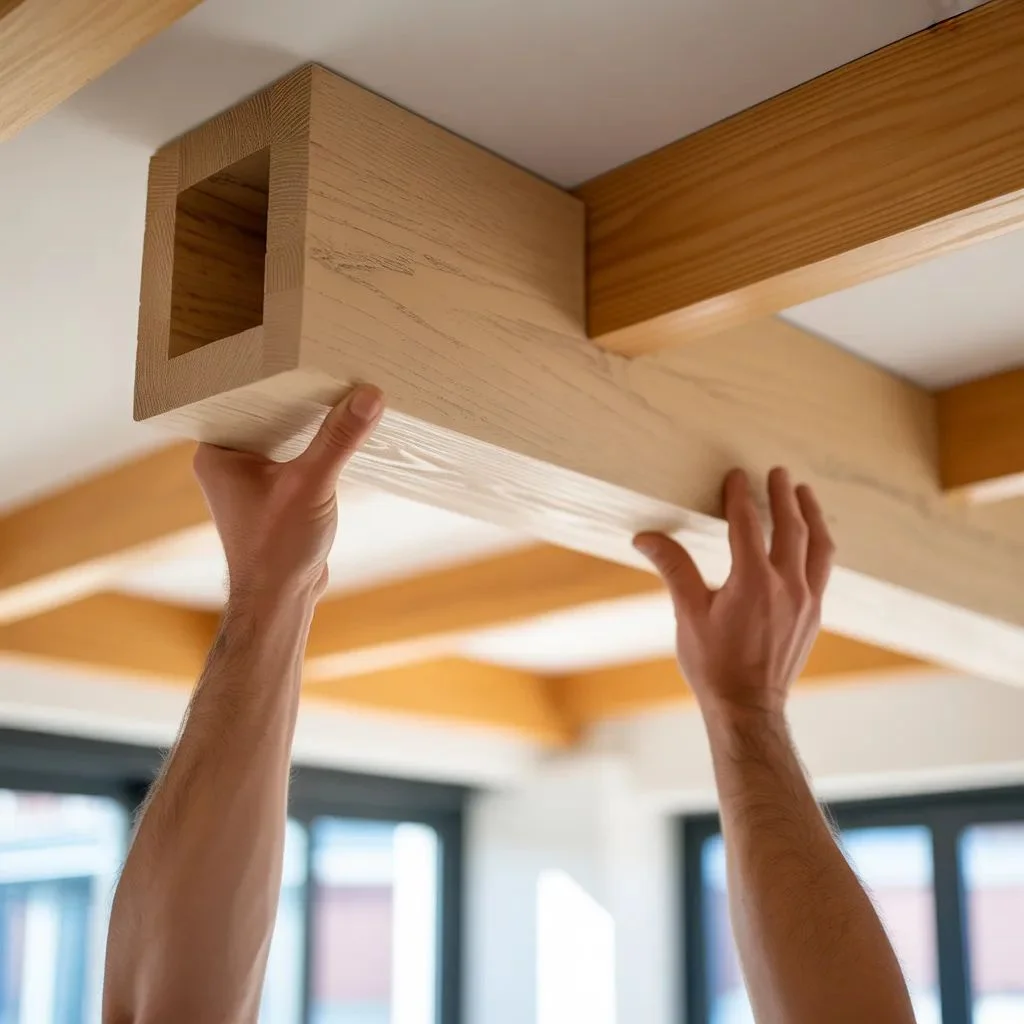
The Budget Install Method That Works Again and Again
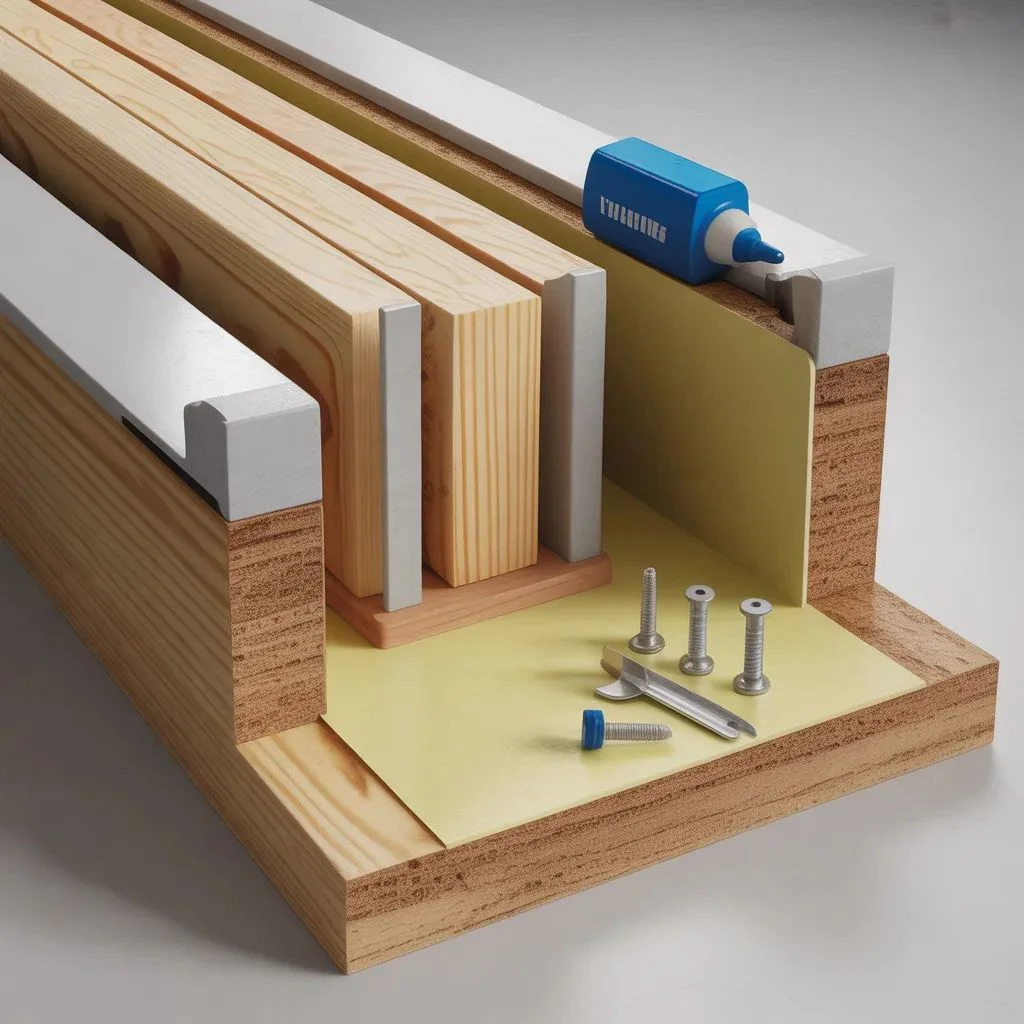
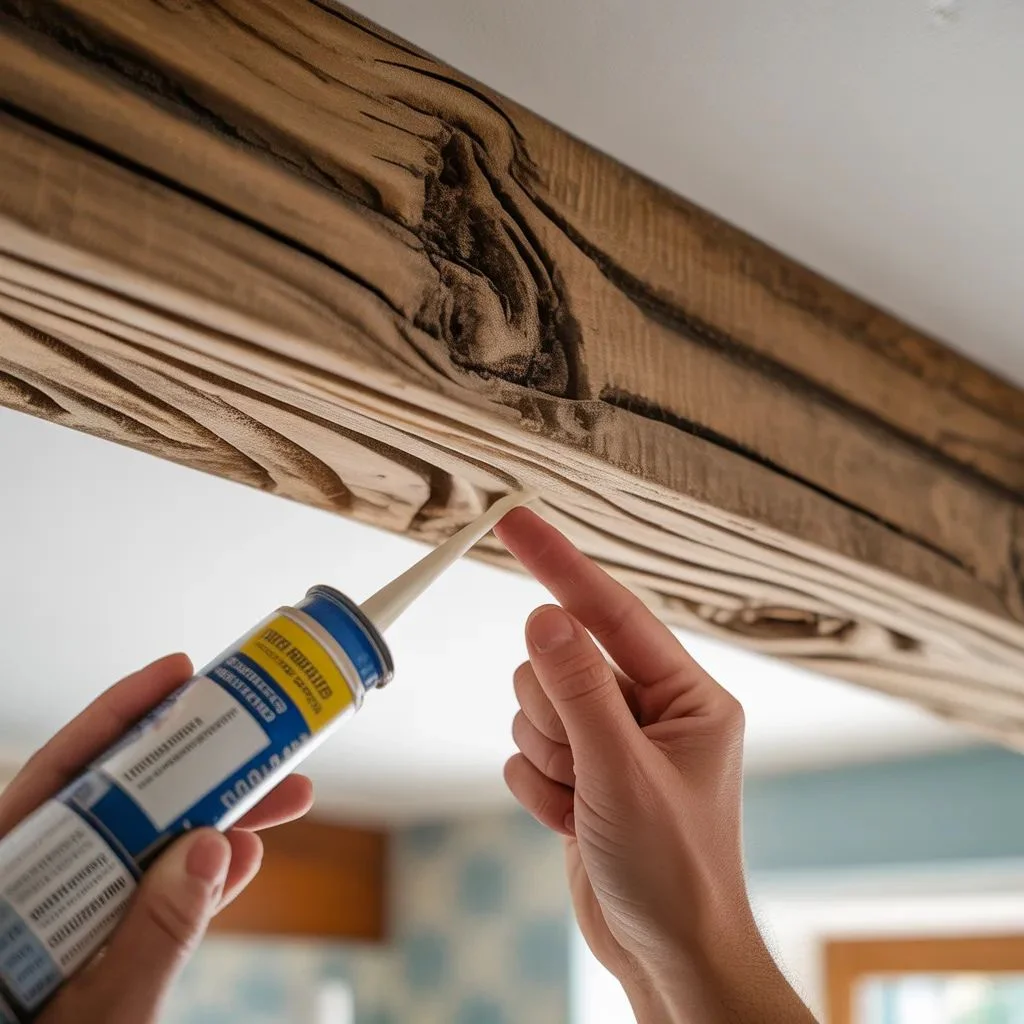
The most common low-cost installation method is straightforward: secure wood blocking or a 2×4 cleat to the ceiling, dry fit the beam, apply construction adhesive, then fasten the beam with trim screws, finishing nails, or both. Lowe’s says faux beams are typically installed after finding ceiling framing, marking the layout, adding end supports, applying construction adhesive, and pressing the beam into place. Ekena’s installation guide adds more detail, recommending wood blocking every 3 to 6 feet, dry fitting before adhesive, and fastening the beam to the blocking with finishing nails or screws.
SnapTight’s installation manual follows the same basic logic from another angle: mark the line for a 2×4, secure it firmly to solid backing where possible, apply adhesive inside the beam cavity, slide the beam into place, and use small trim screws if needed. That consistency across sources is useful because it shows the method is not a one-brand trick. It is the standard budget-friendly pattern for lightweight faux beams.
A few small details make this method work better. Ekena recommends acclimating beams in the room for at least 24 hours before install, cutting slightly long when needed, and dry fitting before adhesive. Those steps sound minor, but they help prevent gaps, crooked joints, and waste. When every board and tube of adhesive counts, that is exactly the kind of detail that keeps a budget project from turning into a redo.
Three Budget-Friendly Install Routes That Actually Make Sense
Buy Prefinished Faux Beams and Use Fewer of Them
This is the easiest route for homeowners who want the look without a lot of shop work. You pay more per beam, but you save time on staining, assembly, and cleanup. To keep the budget under control, use fewer beams and place them where the eye naturally lands. A single strong beam or a simple pair often looks more expensive than several small beams with awkward spacing.
Build DIY Box Beams From Common Lumber
This route usually offers the best balance of cost and customization. It is especially attractive if you already own basic tools and do not mind painting or staining. Family Handyman’s recent project notes that this faux beam style can be built using store-bought 1×6 boards and does not require a table saw, which makes it more accessible than many people expect. For smaller rooms and lower ceilings, this can be the sweet spot for Fake Beams on Ceiling on a Budget.
Create a Beam-and-Panel Ceiling Instead of Deep Beams
This is the overlooked budget option. Lowe’s decorative ceiling project uses hardboard panels, MDF stock, cove moulding, construction adhesive, and nails to build a decorative beamed look. It is rated as an intermediate project and pitched as a one-weekend update. If you want the visual rhythm of beams across a flat ceiling without buying multiple large faux beam pieces, this method can stretch your budget further.

The Finishing Details That Make Cheap Beams Look Custom
Good finishing is what separates a budget beam job from a cheap looking one. Ekena’s guide says screws should be countersunk, then filled and painted for a finished look. It also recommends cleaning excess adhesive and caulking where the beam meets the wall if needed. SnapTight similarly notes that small holes can be concealed with dark caulk if a fastener punctures the finish. These are simple, low-cost fixes, but they have a big visual payoff.
Joint placement matters too. SnapTight advises that if more than one beam is needed to span a room, the joint is often best placed strategically near the middle, while cut ends are better terminated at a wall when possible. That is smart advice for both appearance and budgeting. Factory-finished ends usually look cleaner, and fewer visible correction cuts mean less patching and less frustration.
Mistakes That Waste Money Fast
The most expensive beam mistakes are usually not dramatic. They are small planning errors that stack up. Uneven spacing, ignoring lights and vents, skipping dry fitting, and fastening into weak backing are the big ones. Lowe’s stresses layout accuracy, support placement, and alignment, while Ekena recommends blocking every 3 to 6 feet and using toggle or molly bolts where framing does not line up with the blocking. In other words, cheap-looking results usually come from rushed prep, not just cheap materials.
Another mistake is trying to fake a high-end ceiling by using too many short pieces. Every extra seam adds cutting, fastening, filling, and touch-up work. On a budget, longer uninterrupted lines almost always look better. Keep the pattern simple, keep the spacing even, and spend your effort on crisp installation instead of trying to fill the whole ceiling.

A Practical Final Word
The best version of Fake Beams on Ceiling on a Budget is the one that fits your room, your tools, and your patience level. If you want the fastest path, use lightweight hollow faux beams over blocking. If you want the lowest cost, build box beams from common lumber. If you want the look of a whole ceiling treatment without paying for multiple deep beams, consider a beam-and-panel design. All three approaches can look beautiful when the layout is clean and the finishing is careful.
Recommended: Easy Beadboard Ceiling Ideas to Upgrade Your Interior Design.
FAQs That Matter Before You Start
Are faux ceiling beams hard to install?
Not usually. Lowe’s describes faux wood beams as a project a homeowner with basic carpentry skills can handle, especially because the materials are lighter than real wood. The difficulty goes up if your ceiling is uneven, very high, or full of fixtures.
What is the cheapest way to get the beam look?
For many rooms, the cheapest path is either a DIY box beam made from store boards or a decorative beam-and-panel ceiling using panels and trim. Off-the-shelf faux beams can still be worth it, but current listings show they can cost hundreds each depending on size and material.
Can faux beams go on a drywall ceiling?
Yes, but the mounting matters. Manufacturer instructions recommend fastening wood blocking or a 2×4 cleat securely to framing when possible and using appropriate anchors like toggle or molly bolts where framing does not align with the blocking.
How far apart should the blocking go?
Ekena’s installation guide recommends installing wood blocking every 3 to 6 feet. That is one of the most useful numbers to keep in mind before you start cutting beams.

