

A beautifully arranged Christmas village has a quiet magic-tiny lamp-posts glowing like warm fireflies, miniature homes dusted in faux snow, and tiny townsfolk pausing mid-cheer. Whether you’re a seasoned collector or building your first display, finding the right christmas village set up ideas can help you turn a simple table into a breath-taking winter wonderland.
Today, Christmas villages are more than décor; they’re immersive holiday moments. And the best part? You don’t need a huge budget or professional skills. With a few clever layout techniques, smart lighting, and a sprinkle of creativity, anyone can style a charming village scene.
We’ll explore 5 unique, realistic, and beginner-friendly setups, along with expert layout tips, studio-worthy lighting tricks, and DIY elements you can create at home. You’ll also find practical examples, step-by-step suggestions, and resourceful ways to enhance your display using simple items from craft stores or online.
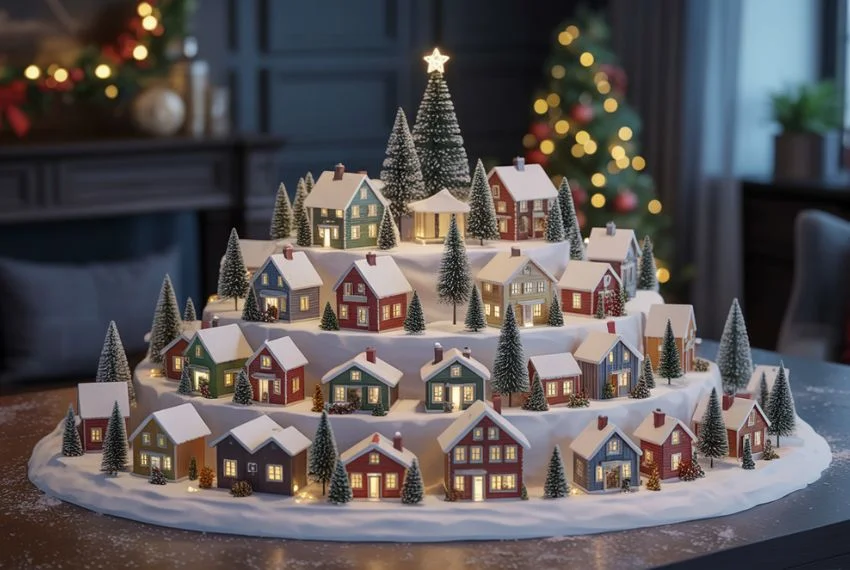
1. Build a Layered Village Base
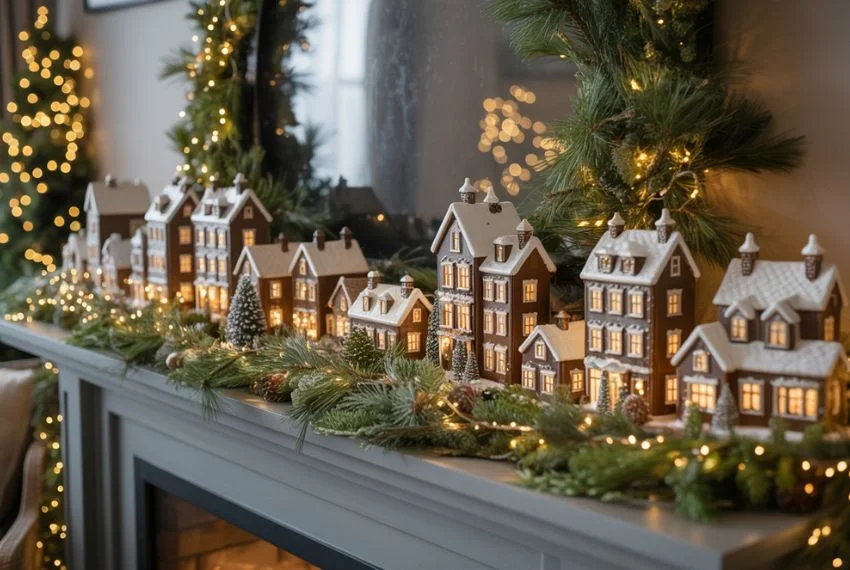
One of the most effective christmas village set up ideas is creating layers. Elevation adds depth, perspective, and movement to your display. Instead of placing everything on a flat table, use different heights to mimic hills, cliffs, and snowy slopes.
You can achieve this with simple, budget-friendly materials:
- Foam boards
- Wooden crates
- Cardboard risers
- Books (hidden under cloth or snow fabric)
- Tiered shelves
Start by placing taller buildings like churches or town halls in the back. Medium-height structures go in the middle, and small cottages sit upfront. This arrangement helps the village feel naturally organized—just like a real town rising into the distance.
To make the layers seamless, cover your risers with:
- White fleece fabric
- Faux snow blankets
- Cotton batting
- Glittered snow mats
For added realism, sprinkle fine artificial snow on top. You can also carve foam board into gentle slopes to create rolling snowy hills.
Creating layers ensures every piece is visible, well-lit, and part of the story. This simple method transforms even a small display into an immersive landscape with cinematic charm.
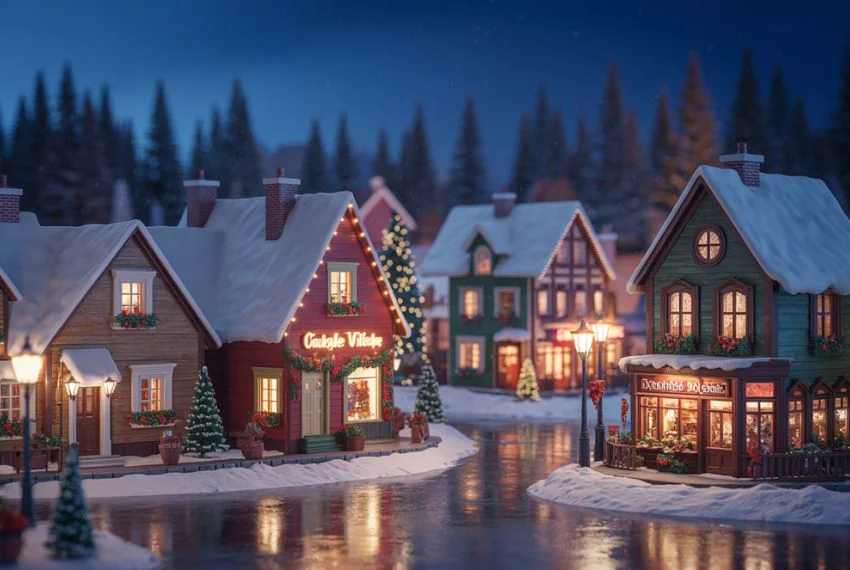
2. Add Realistic Lighting Effects
Lighting can turn a simple display into a magical scene. Whether you’re using plug-in lights, LED string lights, or tiny battery-powered lamps, the right glow helps your village feel alive.
Start with warm-toned LEDs. They create a cozy ambiance and highlight building windows beautifully. You can tuck micro-lights inside houses if they don’t come pre-lit. Stick-on puck lights or under-shelf lights can illuminate the entire base layer softly without harsh glare.
Here’s a clever trick: Place LED tealights behind churches or near snowy trees to mimic lanterns glowing in the night. For streetlights, use small battery-powered village lampposts—you’ll find these in most craft stores during the holiday season.
If you want cinematic depth, add “moonlight.” Position a cool-toned LED behind the village to cast gentle shadows, giving the scene nighttime charm.
Safety tip: Avoid real candles—they can melt snow fabric or damage resin figurines.
Lighting is one of the most powerful Christmas village set up ideas, and with just a few inexpensive LEDs, you can create breath-taking realism.
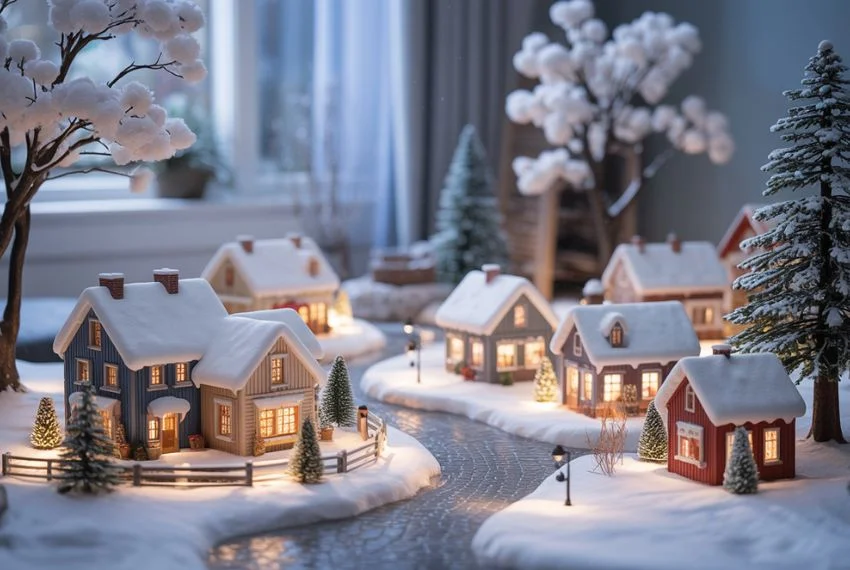
3. Use Natural Snowy Textures
Snow is the soul of a winter village, and using high-quality textures makes all the difference. Instead of relying on cotton alone, you can blend materials for a realistic, soft, layered snowfall.
Use this combination for best results:
- Fine artificial snow (for dusting)
- Fleece fabric (as a base)
- Powdered snow spray (for rooftops)
- Glitter flakes (for shimmer)
- Cotton batting (for snowdrifts or soft hills)
For paths and roads, gently press down the “snow” to make a natural-looking walkway. Sprinkle a tiny bit of fine snow around the edges so it feels gently trodden, not overly designed.
A helpful tip: Use a stiff brush to apply snow spray on roofs—it creates a wind-swept, powdery texture that looks like fresh snowfall.
You can also create frozen lakes using:
- Clear glass tiles
- Mirror sheets
- Blue resin discs
- Acrylic sheets dusted with glitter
Natural snow textures add depth and enhance your miniature holiday Christmas village set up ideas, making it look more like a living winter tale than a tabletop display.
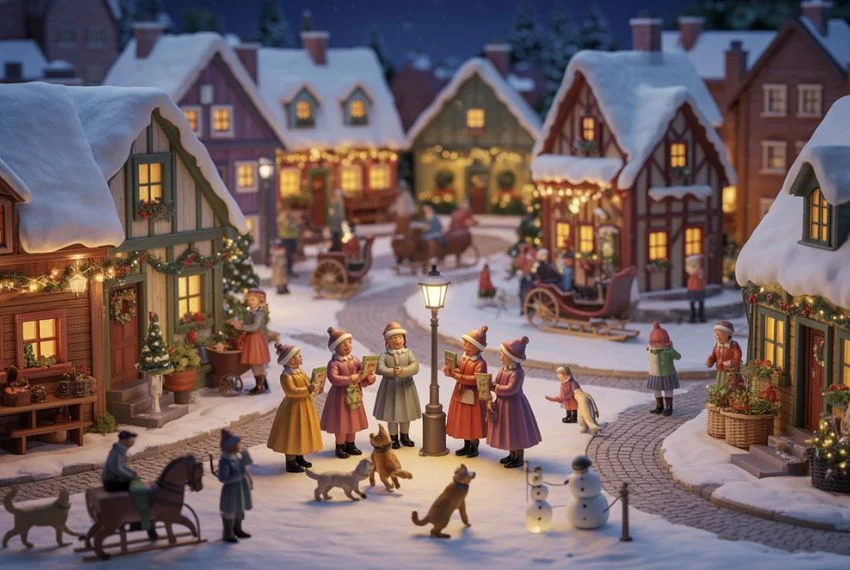
4. Create Charming Miniature Scenes
While buildings create structure, small scenes add heart. Think of your Christmas village as a story unfolding. Add tiny moments of life—children making snowmen, couples ice-skating, townsfolk carrying gifts.
These tiny scenes help your village feel alive and imaginative.
Here are easy additions:
- A market square with tiny food stands
- Carollers grouped near a church
- A skating rink with resin “ice”
- A miniature train circling the village
- Santa’s sleigh flying on invisible wire
- A Christmas tree-lighting ceremony scene
Use Christmas village accessories like benches, fences, animals, carts, and snow-covered trees to enrich the environment. A simple park bench with a lamppost can add surprising depth.
To keep everything proportionate, group accessories close together. Spreading them too far apart breaks the storytelling flow.
Creating charming moments is one of the best DIY Christmas village set up ideas display tricks to elevate your holiday décor without buying big, expensive pieces.
5. Design a Cozy Home Display
Whether your space is large or small, there’s always room for a Christmas village. A cozy, well-designed display can be built on bookshelves, console tables, mantels, coffee tables, or even kitchen counters.
Start by choosing your location. If you’re short on space, try:
- Tiered wall shelves
- Floating shelves
- Narrow console tables
- Window sills
- Sideboard tops
Use the layering technique mentioned earlier and complement it with festive additions like:
- Garland outlining the border
- Battery-powered string lights
- Mini bottle-brush trees
- Faux candle lanterns nearby
If your style leans modern, keep the layout minimal: fewer pieces, clean lines, and neutral snow textures. For a rustic look, incorporate wooden risers, pinecones, and burlap accents.
This approach fits beautifully with christmas village set up ideas trends since it blends your Christmas village with existing décor.
To keep cords hidden, tape them behind furniture or tuck them under snow fabric. Wireless pieces make this even easier.
Final Thoughts
Designing a magical holiday display comes down to creativity, smart layering, and storytelling. With these christmas village set up ideas, you can transform any corner of your home into a charming winter wonderland full of warmth and imagination.
Whether you prefer a simple layout or an elaborate multi-layered display, each idea helps bring your miniature village to life with personality, depth, and holiday cheer. From lighting and textures to realistic scenes and cozy placements, every detail adds sparkle to your seasonal décor.
Also Check our latest blogs about trendy christmas crafts for adults.
FAQs
1. How do I start a Christmas village setup?
Begin with a flat base, add risers for height, place buildings by size, and layer snow fabric before adding accessories and lights.
2. What is the best lighting for Christmas villages?
Warm LED lights create the coziest glow. Mini string lights, battery lampposts, and soft under-shelf lighting work beautifully.
3. How do I make my village look realistic?
Blend different snow textures, group accessories, add figurines in active scenes, and use angled lighting for depth.
4. Where should I place my Christmas village?
Console tables, mantels, bookshelves, dining tables, and window sills are ideal for both small and large setups.
5. How can I add movement to my display?
Use animated pieces like rotating ice rinks, moving trains, or glowing lampposts for dynamic visual interest.