
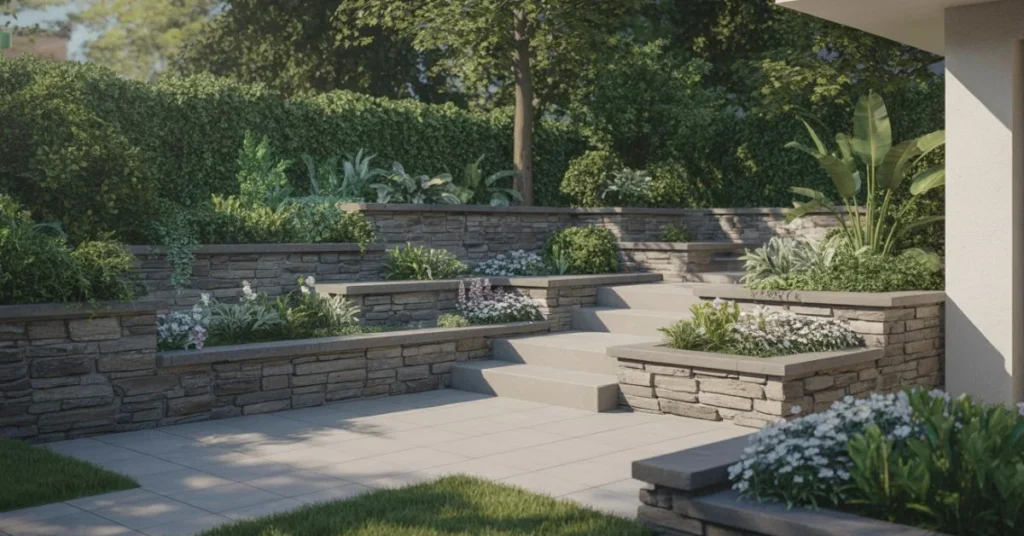
Rock retaining walls are more than just a functional feature—they’re a way to transform your house yard into a stunning and organized outdoor space. These walls help prevent soil erosion, manage sloped yards, and create terraces, flower beds, or seating areas. Imagine a previously unusable slope now converted into a lush garden with stone walls defining each level. Well-built rock retaining walls not only last for decades but also add character, charm, and a natural appeal to your backyard.
By understanding planning, material selection, foundation preparation, drainage, and maintenance, you can create a rock retaining wall that’s both durable and visually striking. This guide will walk you through expert tips and practical steps for building rock walls that impress and stand the test of time.
Planning Your Rock Retaining Wall
Planning is the foundation of a successful rock retaining wall. Start by evaluating the slope, soil type, and drainage of your yard. Decide if the wall is purely decorative, functional, or both. Consider whether you want a freestanding wall, terraced steps, or corner walls that highlight garden spaces.
Planning Tips:
- Measure your yard carefully and mark the layout with stakes and string.
- Identify the slope gradient and soil stability to determine wall height.
- Check local building codes for height restrictions or permits.
- Decide on a design style: rustic, naturalistic, modern, or terraced.
- Think about integration with other landscaping features like pathways, flower beds, or seating areas.
Choosing the Right Materials For Rock Retaining Walls
Selecting the right rock is crucial for durability and appearance. Different stone types have unique characteristics and textures. Natural rocks like granite, limestone, or fieldstone provide a rugged, authentic look, while cut or stacked stones offer a clean, modern aesthetic.
Material Tips:
- Granite: Extremely durable, ideal for high-traffic areas and long-lasting walls.
- Limestone: Slightly softer but offers a warm, natural look.
- Fieldstone or Boulder Mix: Creates a rustic and natural appearance.
- Eco-friendly options: Salvaged or locally sourced rocks reduce environmental impact.
- Mix sizes for natural stability and aesthetic appeal.
Additional Considerations:
- Polished vs. rough-cut: Polished stones give a modern feel, rough-cut adds texture.
- Weight and handling: Ensure stones are manageable for DIY projects or plan professional help for heavy boulders.
Preparing the Foundation
A strong foundation ensures your wall lasts for years. Start by excavating a trench slightly wider than your planned wall. Add a gravel base for drainage and compact it firmly. Using landscape fabric beneath the gravel helps prevent weed growth and soil movement.
Step-by-Step Foundation Prep:
- Dig a trench 6–12 inches deep depending on wall height.
- Add a 3–4 inch layer of coarse gravel.
- Compact the gravel using a tamper.
- Lay landscape fabric if desired for additional stability.
Tips:
- A level base prevents leaning and shifting.
- For DIY projects, smaller stones are easier to manage; heavier walls may require machinery or professional assistance.
Building the Rock Retaining Wall
Start with the largest stones at the bottom and work upward, staggering joints to improve stability. Fill gaps with smaller stones or gravel to reinforce the wall.
Step-by-Step Construction:
- Lay base stones firmly on the gravel foundation.
- Place each stone carefully, checking level regularly.
- Stagger vertical joints to increase strength.
- Use smaller stones or gravel to fill gaps.
- Slightly set back each layer to create a natural slope.
Common Mistakes to Avoid:
- Not compacting the base properly.
- Using soft or crumbling stones.
- Over-tilting walls without proper backfill.
Safety Tips:
- Wear gloves and protective gear.
- Lift heavy stones with proper technique or equipment.
Drainage Considerations
Proper drainage is essential to prevent water pressure from damaging your wall. Water build-up behind walls can lead to cracking or collapse.
Drainage Tips:
- Install perforated pipes at the base to channel water away.
- Backfill with coarse gravel for effective drainage.
- Avoid compacting soil directly behind the wall; allow for water movement.
- Plant moisture-tolerant greenery near the wall to help manage runoff naturally.
Finishing Touches
A completed rock retaining walls becomes the centrepiece of your yard when complemented with landscaping and décor.
Ideas:
- Plant groundcovers, shrubs, or flowering plants along terraces.
- Add ambient lighting for evenings.
- Place decorative rocks, mulch, or small seating areas on top.
- Seasonal accents like planters or garden ornaments enhance visual appeal.
Maintenance Tips
Even durable rock walls need upkeep. Regular inspections prevent costly repairs and keep your yard looking its best.
- Inspect walls twice a year, especially after heavy rain or snow.
- Replace or reposition any shifted stones.
- Keep drainage channels clear of debris.
- Trim weeds and remove moss or algae build-up.
Design Styles for Rock Retaining Walls
Adding style to functionality makes your yard truly stand out.
Popular Styles:
- Rustic: Rough-cut stones for natural charm.
- Modern: Clean, stacked stones with straight lines.
- Terraced: Multiple levels for planting or seating.
- Naturalistic: Mix of boulders and smaller rocks for organic appearance.
Cost and DIY Considerations
Building a rock retaining wall is an investment in both time and money.
DIY Costs:
- Small walls using local stones: low to moderate cost.
- Larger walls: higher cost, may require professional equipment.
Tools Needed:
- Shovels, tamper, level, gloves, wheelbarrow.
Professional Help:
- Ensures long-term stability.
- Saves time and effort on heavy lifting.
- May include additional design enhancements.
Final Note
Rock retaining walls combine durability with beauty, transforming slopes and plain areas into stunning, functional outdoor spaces. With careful planning, the right materials, proper drainage, and thoughtful landscaping, your walls can last for decades while adding lasting value to your house yard. Start small if you’re a DIY enthusiast, and gradually expand your walls to include terraces, seating areas, and garden accents for maximum impact.
Read Also About Luxury Pool Waterfall Ideas.
FAQs
Q1: How high can a rock retaining wall be built safely?
Most residential walls can safely reach 3–4 feet. Taller walls may need engineering support.
Q2: Can I build a rock retaining wall myself?
Yes, with proper planning and the right tools. Heavier walls may require professional help.
Q3: How do I prevent stones from shifting?
Compact the base, stagger joints, backfill with gravel, and perform regular inspections.
Q4: Which rocks are best for retaining walls?
Hard stones like granite and limestone are ideal for durability. Avoid soft rocks that erode quickly.
Q5: How much does it cost to build a rock retaining wall?
Costs vary based on size, materials, and labour. DIY is cheaper; professional installation ensures stability.