
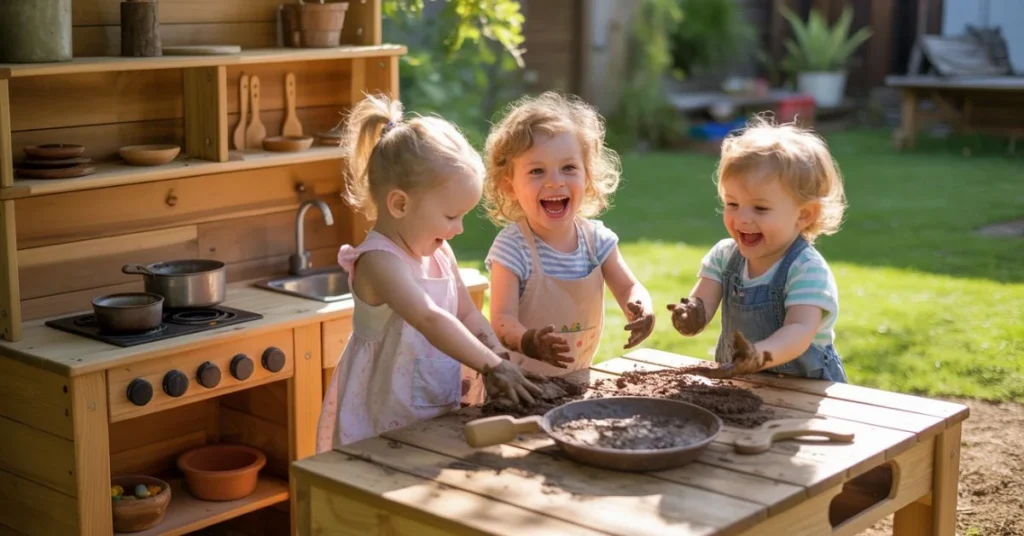
Creating a mud kitchen in your backyard is one of the easiest ways to inspire outdoor play, spark imagination, and give kids a fun reason to spend time in nature. Many parents share how their children spend hours mixing mud pies, “cooking” with leaves, and using simple ingredients from the garden to pretend they’re running their own little café. I still remember visiting a cousin’s home where their toddlers proudly handed me a “mud muffin.” Even though it was messy, the joy on their faces showed how powerful hands-on play can be.
A mud kitchen does more than entertain kids — it encourages creativity, sensory play, and early learning skills. With a few wooden pallets, bowls, and simple accessories, you can create a beautiful, functional play space right in your backyard. Below is a full guide covering designs, DIY steps, kid-safe ideas, and creative setups your readers will love.
What Is a Mud Kitchen?
A mud kitchen is a child-sized outdoor kitchen where kids use soil, water, sand, and natural materials to create imaginative “meals.” It usually includes a counter, a sink bowl, small shelves, and hooks for utensils. Parents love it because it’s simple, engaging, and encourages screen-free outdoor play.
Kids get to explore textures, shapes, and natural elements while pretending they are chefs, bakers, or gardeners. Whether you choose a rustic wooden design or a modern painted setup, a mud kitchen becomes a fun spot where kids can learn through sensory play.
Simple Backyard Mud Kitchen Ideas
If you want a design that fits any yard, start with simple options that use easily available materials. Many homeowners use old tables, crates, or leftover wood to make a compact mud kitchen perfect for small spaces.
Easy ideas for beginners:
- Use an old side table as the base.
- Add a metal bowl as a sink.
- Place two wooden crates underneath for storage.
- Paint it with kid-safe outdoor paint.
- Add hooks for spoons and cups.
This type of setup is budget-friendly and takes less than an hour to assemble. Kids can immediately start mixing mud, decorating their plates with flower petals, or creating tiny garden cakes.
DIY Mud Kitchen Using Pallets (Step-by-Step Guide)
Building a mud kitchen with pallets is one of the most popular DIY choices. The wood is sturdy, often free, and fits perfectly with outdoor play themes.
Materials Needed
- Wooden pallets
- Metal or plastic bowl
- Screws + drill
- Sandpaper
- Waterproof wood sealant
- Hooks for utensils
- Outdoor-safe paint (optional)
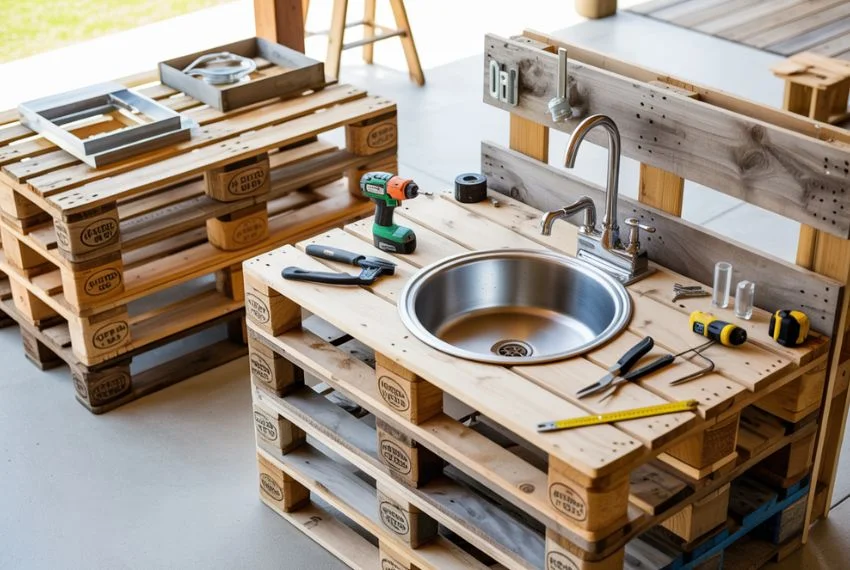
Step-by-Step Instructions
1. Prepare the pallets
Sand them down to remove rough edges and splinters.
2. Build the base
Use one pallet standing upright as the backboard and one lying flat as the counter.
3. Add the sink
Trace a circle on the countertop pallet and cut it out to place the metal bowl.
4. Attach shelves and hooks
Add small shelves for containers and place hooks for cups and spoons.
5. Seal the wood
Use waterproof sealant to protect from rain and mud.
6. Add little touches
Paint the counter, add a small chalkboard, or include name tags like “Mud Café.”
The result looks lovely, lasts for years, and gives kids endless playtime.
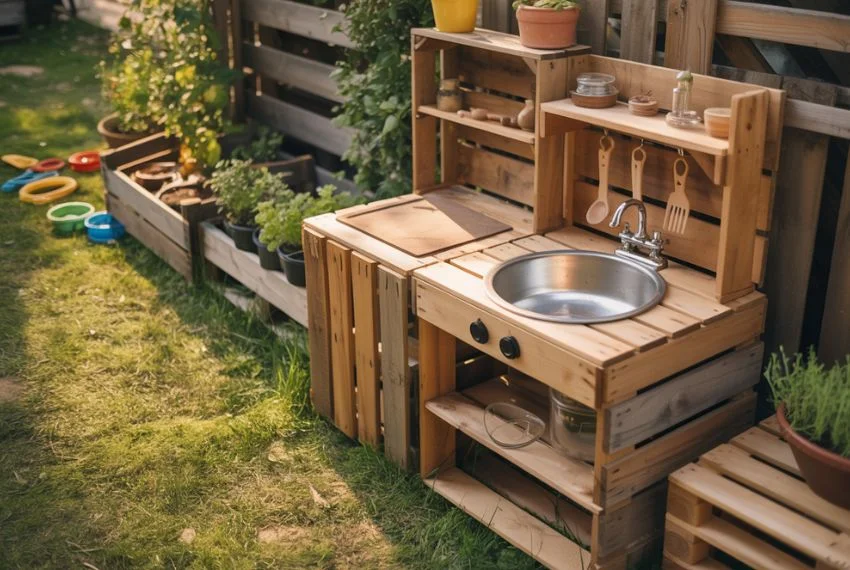
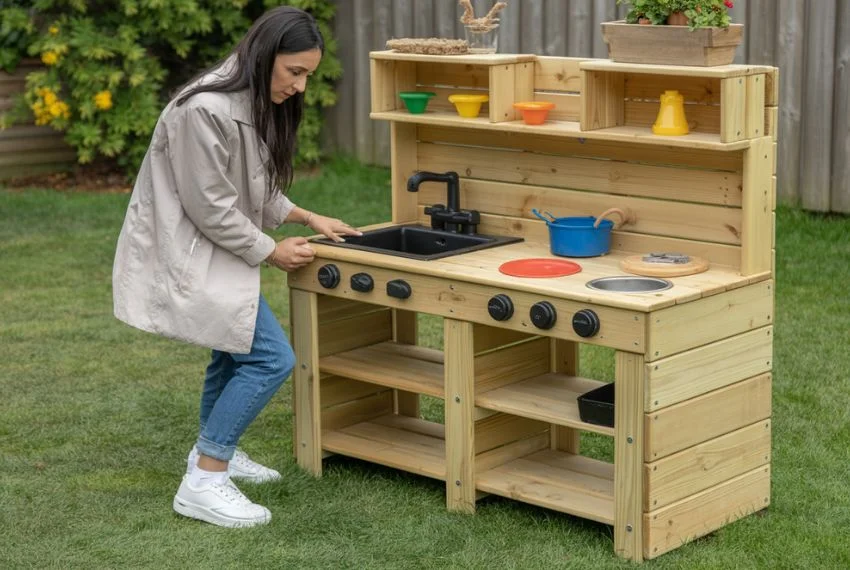
Rustic Wooden Mud Kitchen Designs
If your readers love farmhouse or cottage-style decor, a rustic mud kitchen will fit beautifully into their outdoor space. This design uses natural wood tones and earthy textures to create a warm, inviting look.
Ideas to achieve a rustic style:
- Use reclaimed wood.
- Keep the natural wood color instead of painting it.
- Add tree stumps as seats.
- Use old metal pots, pans, or planters.
- Place it near a garden bed or shady tree.
Rustic mud kitchen designs blend perfectly with outdoor landscapes. They look charming and feel like a natural part of the backyard.
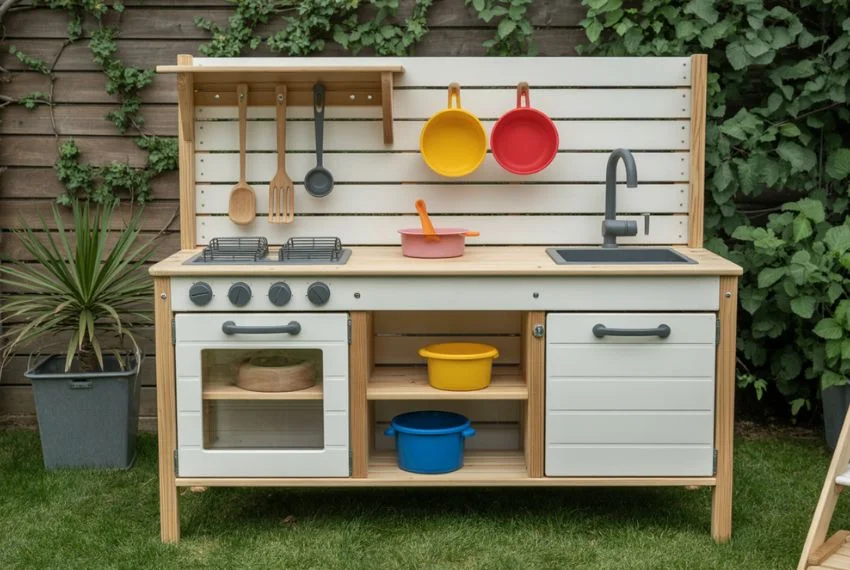
Modern Mud Kitchen Ideas
If you prefer a clean and stylish look, a modern mud kitchen is perfect. These setups are neat, organized, and often match the home’s outdoor design.
Modern design features:
- Smooth painted wood (white, gray, pastel shades)
- Metal handles and hooks
- Open shelves for bowls
- Small countertop stove cutouts
- Water tap or mini faucet add-ons
Kids love modern designs because everything feels like a real kitchen, and parents love how polished the setup looks in the yard.
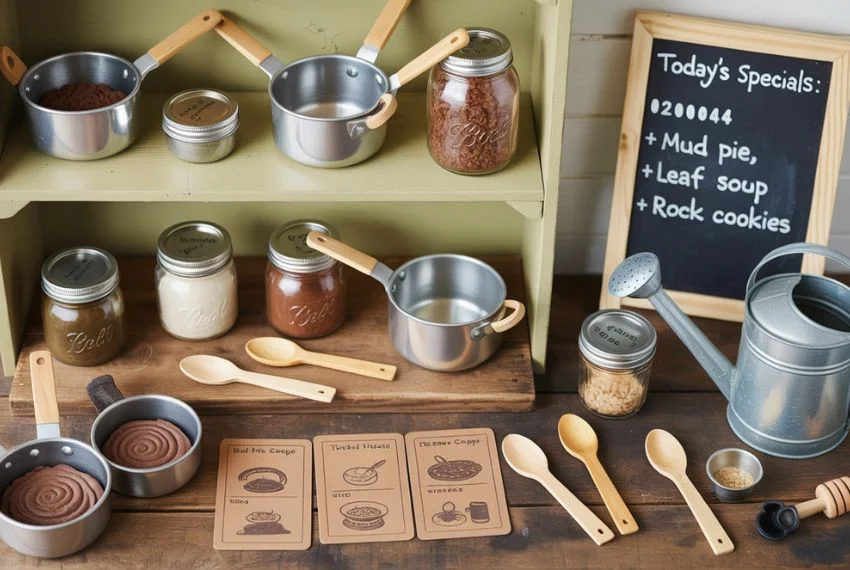
Mud Kitchen Accessories to Add
Accessories make the play area more engaging. You don’t need fancy toys — simple household items work great.
Useful accessories:
- Old pots and pans
- Wooden spoons
- Measuring cups
- Muffin trays
- Mini plant pots
- Watering can
- Chalkboard menu
- Plastic jars for leaves or stones
For extra fun, you can even create “mud recipes” like:
- Flower soup
- Stone cupcakes
- Leaf lasagna
These little extras keep kids busy for hours.
Safety Tips and Maintenance
Even though a mud kitchen is simple, safety should always be considered.
Important safety tips:
- Sand all wooden surfaces.
- Use non-toxic paint and sealant.
- Avoid nails or exposed screws.
- Place it on even ground.
- Check sturdiness every few months.
- Keep bowls clean and replace cracked utensils.
A quick wipe-down and seasonal check will keep your mud kitchen safe and durable through all weather conditions.
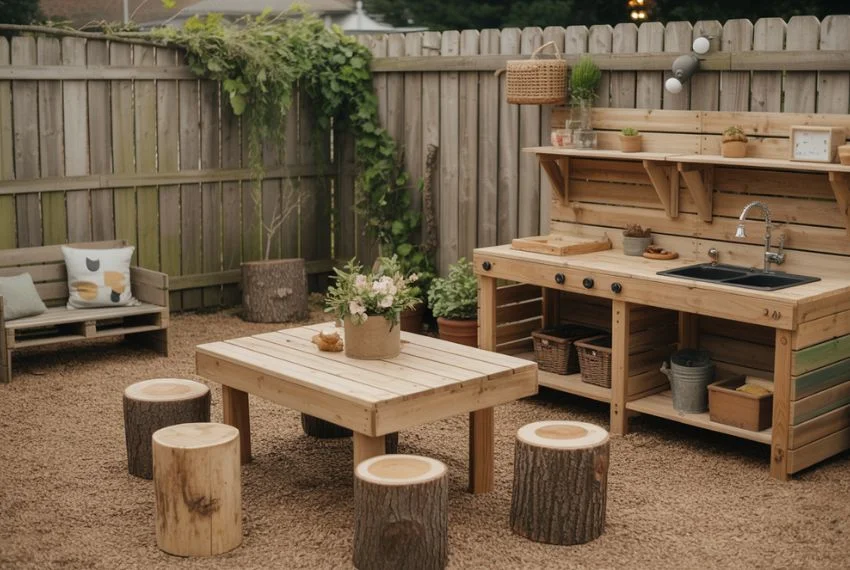
Mud Kitchen Setup Tips for Parents
Where you place the mud kitchen makes a big difference. Kids enjoy being close to nature, but they also need a safe, accessible space.
Best setup locations:
- Near a garden patch
- Under partial shade
- Next to a small water source
- Against a wall or fence for support
- Close enough that parents can supervise easily
You can decorate the space with hanging planters, stepping stones, or a colorful outdoor rug to make the area feel like a mini outdoor café.

Final Thoughts
A mud kitchen is one of the simplest and most enjoyable outdoor play projects you can create for your kids. It sparks creativity, encourages sensory learning, and gives children a real connection with nature. Whether you choose a rustic wooden setup, a modern painted design, or a basic DIY pallet build, a mud kitchen makes outdoor time meaningful, fun, and full of imagination.
Parents love how affordable it is, and children love the freedom to mix, create, and play. With the ideas above, you can now design a beautiful and functional mud kitchen that fits your backyard and keeps kids happily engaged for hours.
Check also Hanging Bird Bath Ideas for your outdoor decor.
FAQs
1. What age is best for a mud kitchen?
Kids ages 2 to 10 enjoy mud kitchens the most.
2. Can I build a mud kitchen indoors?
You can, but outdoor setups are better because they’re meant for messy play.
3. How much does it cost to create a basic mud kitchen?
A simple design using recycled materials can cost as little as $20–$40.
4. What materials work best for outdoor durability?
Treated wood, pallets, metal bowls, and plastic accessories.
5. How do I keep a mud kitchen clean?
Rinse bowls regularly, wipe the counter, and refresh the water bucket daily.