A hot cocoa bar turns a cold evening into something worth gathering around. Instead of one mug made in a hurry, you get a small station where everyone builds their own cup — their cocoa, their toppings, their pace. The best part is that it does not need a big budget or a special room. A corner of the kitchen counter, a tray, and a few jars are enough to start. These hot cocoa bar ideas walk through the whole setup, step by step, so the bar looks styled rather than thrown together.
# Choose the Right Spot
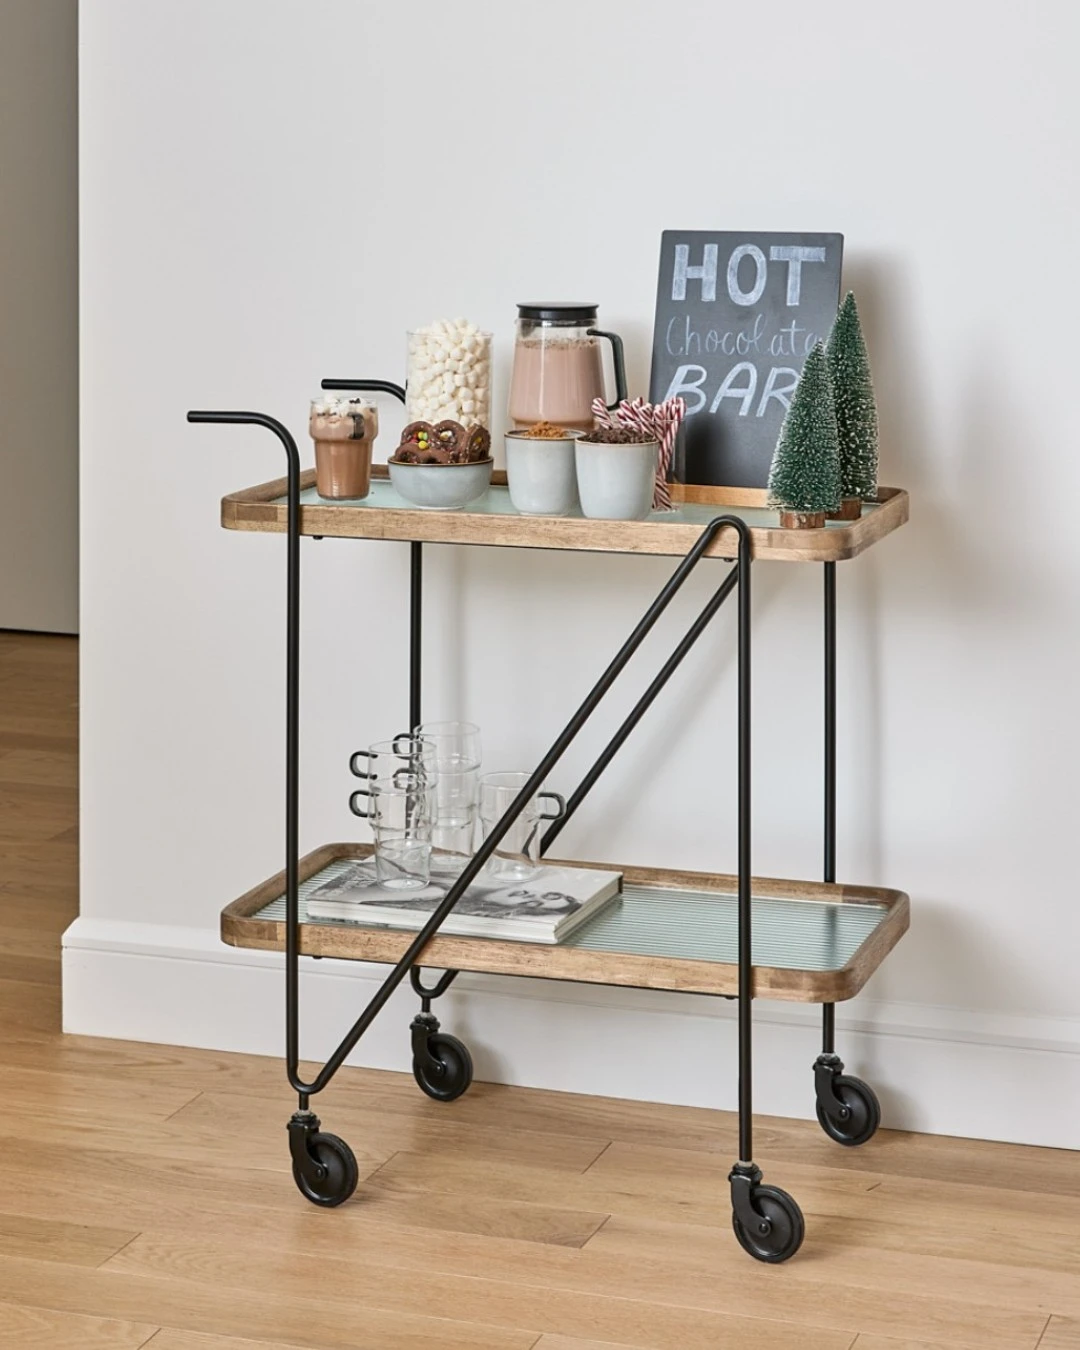
A cocoa bar works best where people already pause — the end of a kitchen counter, a sideboard in the dining room, or a rolling cart tucked into a corner. Pick a spot with a little breathing room on both sides, so two people can stand at the bar without blocking the kitchen. A wall behind the setup helps too, because it gives you a place for a sign or a small garland. In the photo, a rolling bar cart holds the whole station in a corner, with a small chalkboard on the top shelf that reads “HOT Chocolate BAR”. The practical point: choose the spot before you buy anything, and measure the surface so the tray, the mugs, and the jars all fit without crowding.
# Start With a Tray or Tiered Stand
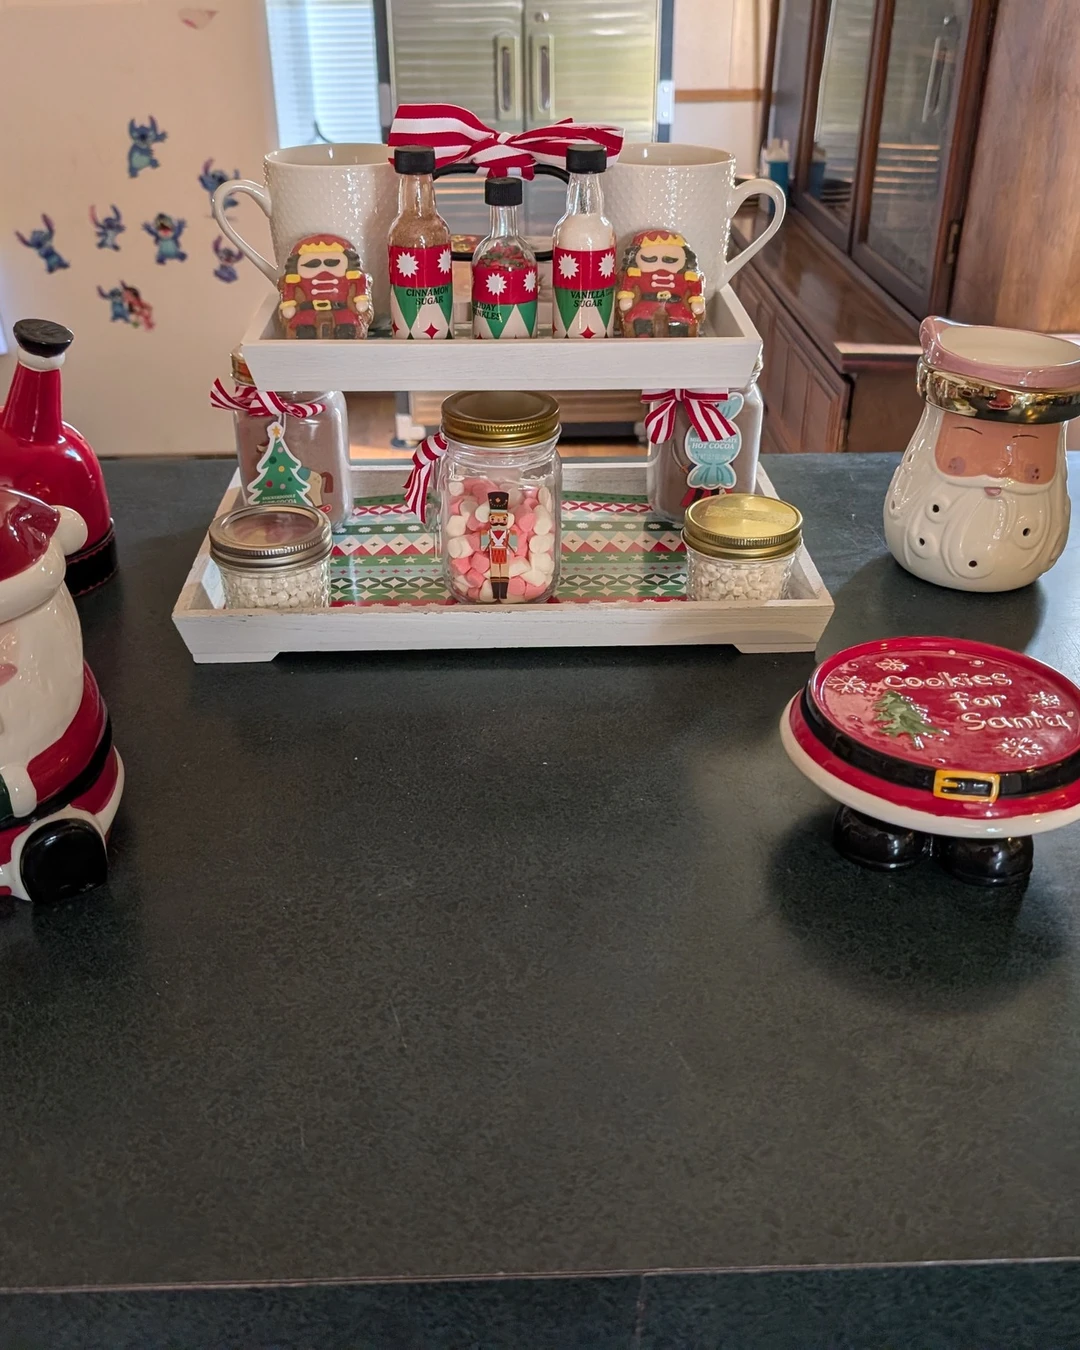
A tray or a tiered stand is what turns a pile of jars into a bar. It gathers everything into one defined area, it catches drips, and it makes the whole setup easy to move when the counter is needed for something else. A two-tier tray works well because the mugs and small bottles sit on top while the jars stay below. In the photo, a white two-tier tray holds two large mugs and three small bottles on the top tier, with jars of marshmallows and cocoa mix on the bottom tier. The Stitch wall decals on the fridge behind it and the “Cookies for Santa” plate at the side are just part of the room around the bar. The practical point: pick a tray that is a little bigger than you think you need, because toppings have a habit of multiplying once you start.
A tray is also the base for other seasonal displays, as in The Little Details That Make Christmas Tray Decor Feel Special.
# Pick the Cocoa Mixes
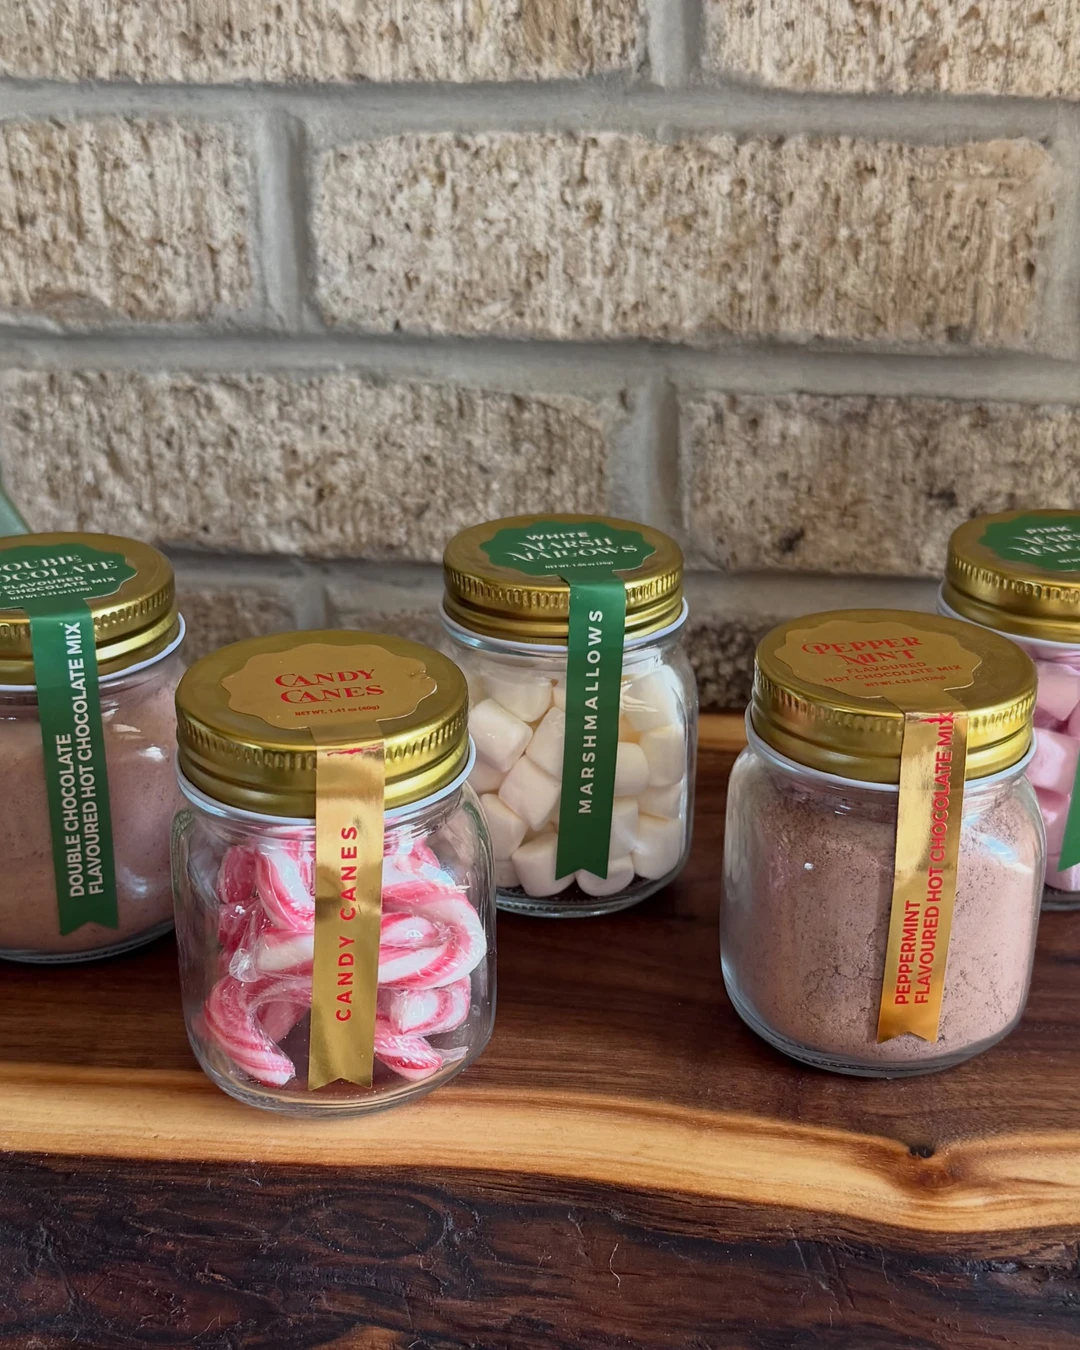
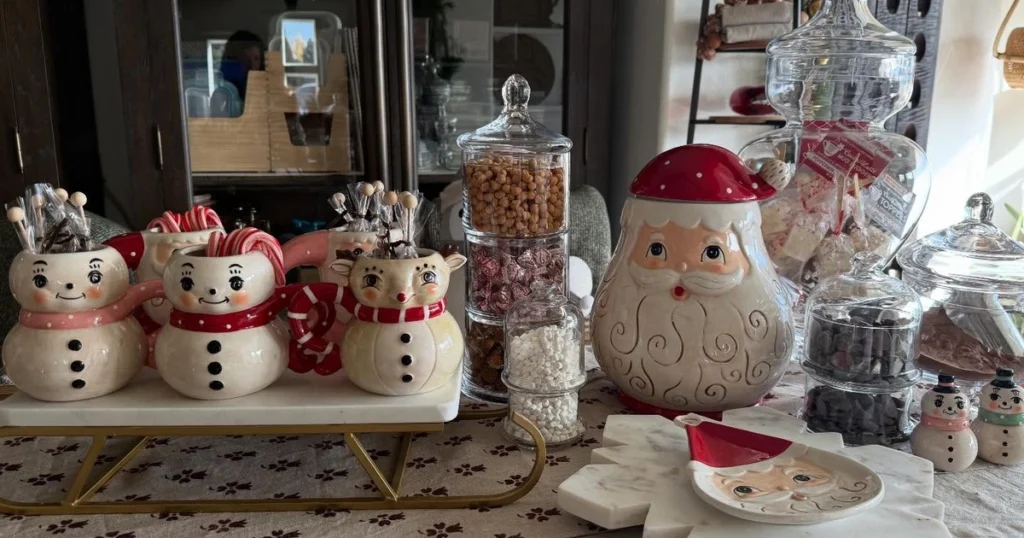
The cocoa itself is the heart of the bar, so offer more than one kind. A classic milk chocolate mix and a dark or peppermint mix cover most tastes, and a white chocolate mix gives guests a lighter option. Store each mix in its own glass jar so the colour and texture show through. In the photo, five small jars sit on a dark wood slab, including “Double Chocolate” and “Peppermint” hot chocolate mixes alongside candy canes and marshmallows. This is a styled gift-set display of jars rather than a bar in use, which is exactly how a good mix collection looks before it is set out. The practical point: two or three mixes are plenty. More than that, and guests spend longer choosing than drinking.
# Display the Mugs
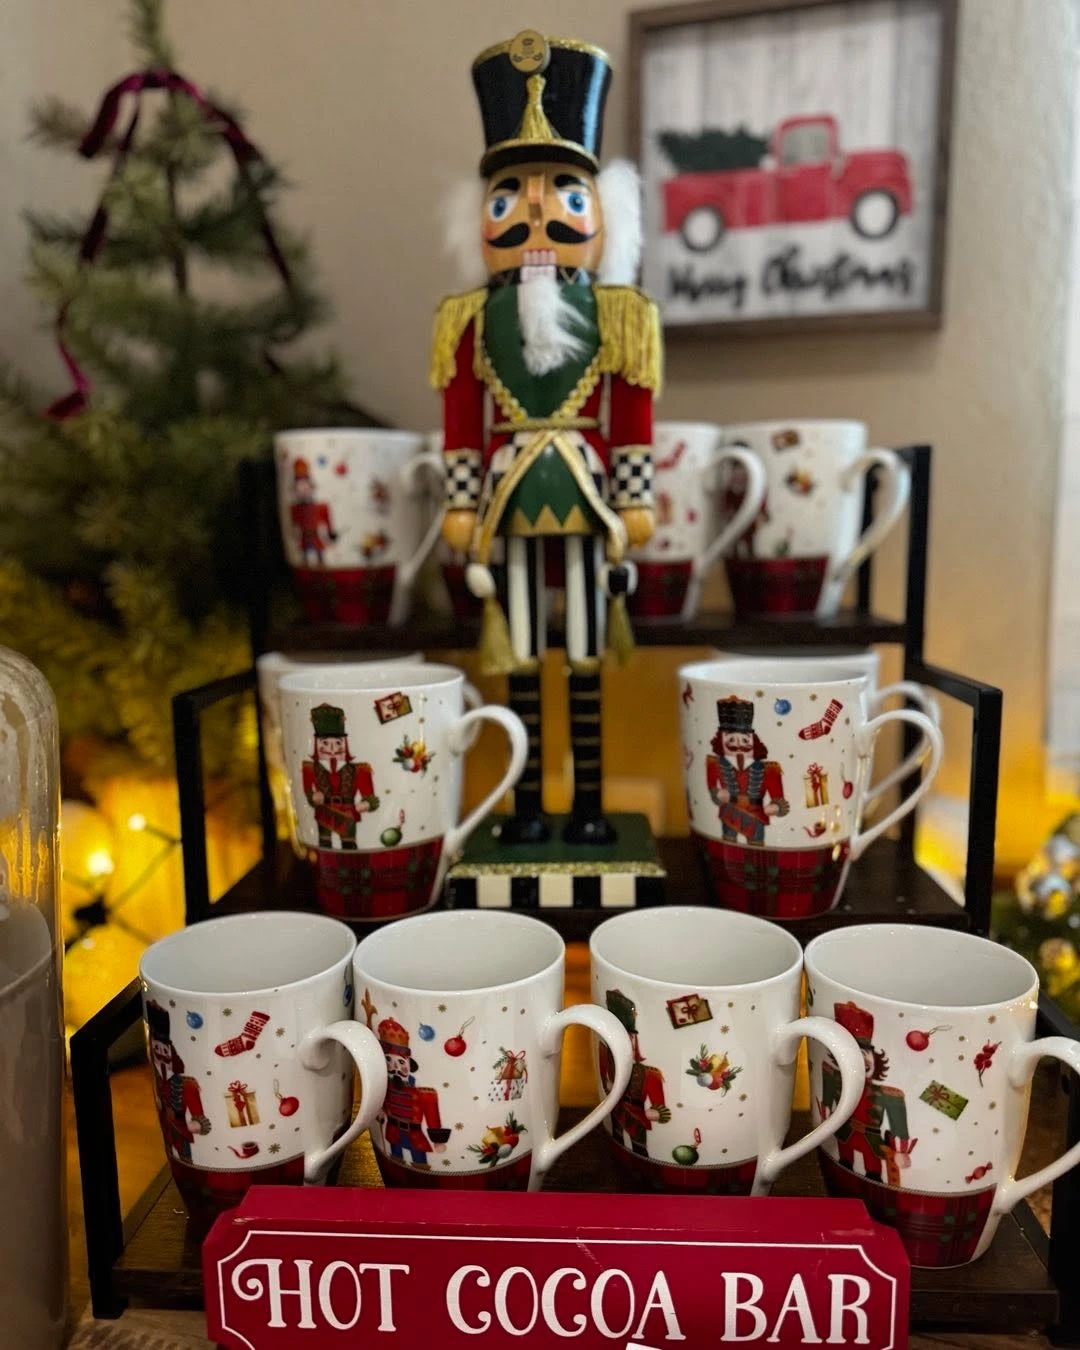
Mugs deserve to be seen, not stacked in a cupboard. A mug rack, a row of hooks, or a tiered stand puts them at eye level and makes the bar feel generous. Mix shapes and patterns, but keep one thing consistent — the size, the colour family, or the theme — so the display reads as a collection rather than a random shelf. In the photo, nine nutcracker-themed mugs sit on a black metal three-tier rack with a tall nutcracker figurine in the middle, and a large red “HOT COCOA BAR” sign runs across the front of the display. The practical point: set out one more mug than you expect to need. Someone always wants a second cup, and an empty hook looks better than a guest waiting.
# Set Out the Toppings
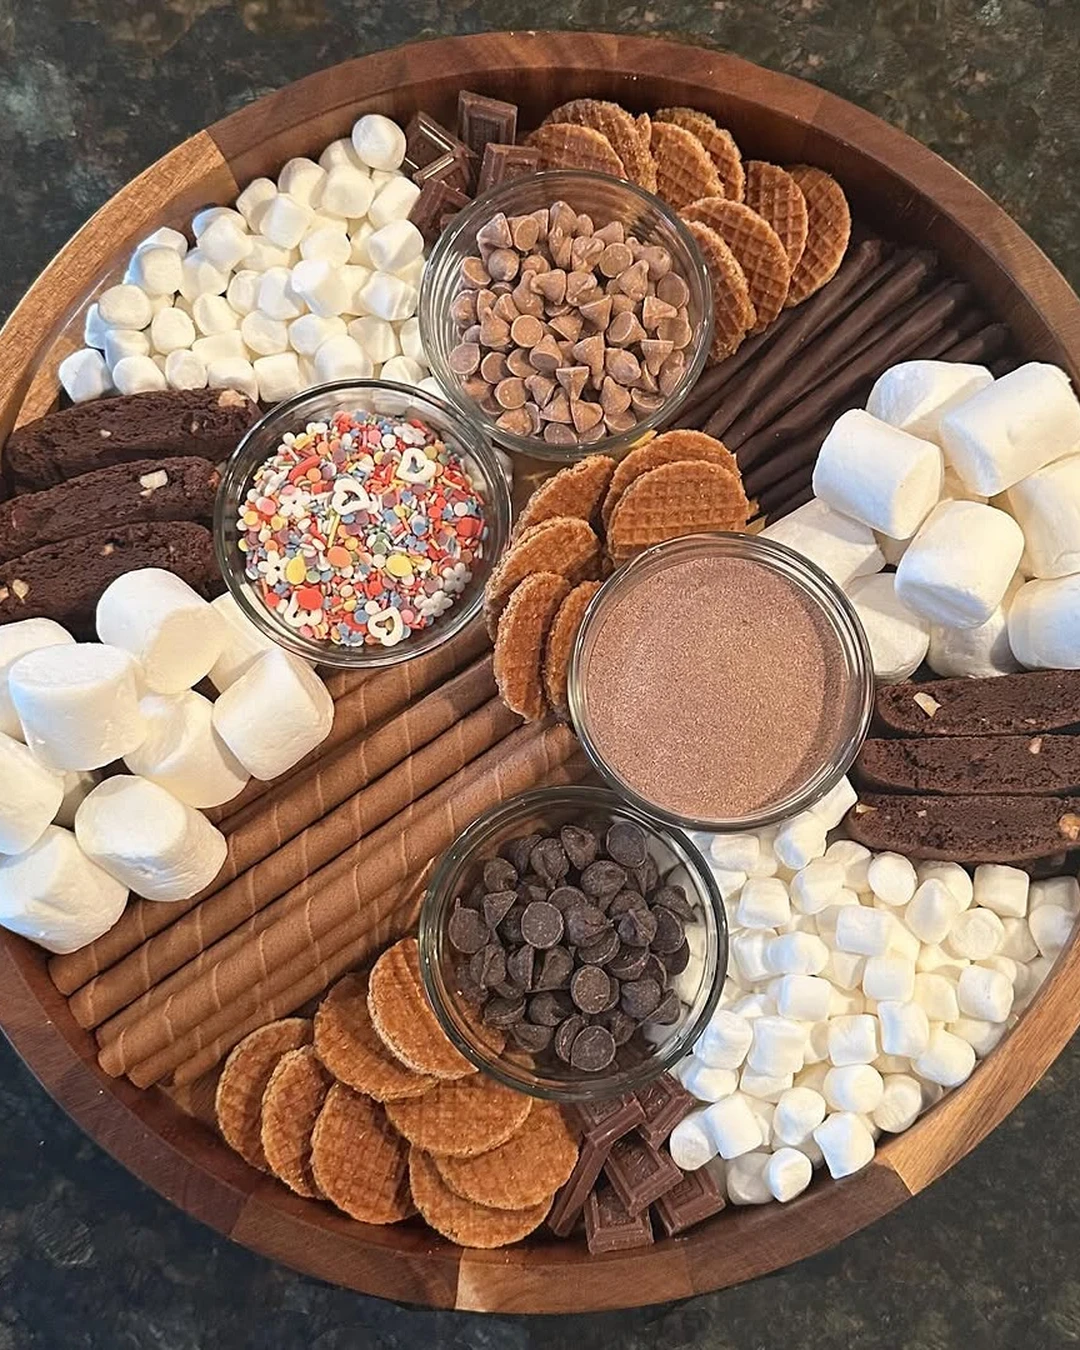
Toppings are where a cocoa bar becomes personal. Marshmallows, chocolate chips, sprinkles, crushed candy canes, and wafer sticks each add a different texture, and small bowls or jars keep them separate and easy to reach. Lay them out on a board so guests can see everything at a glance. In the photo, a large round wooden board holds piles of mini and jumbo marshmallows, bowls of milk and dark chocolate chips, sprinkles, cocoa powder, wafer rolls, and stroopwafel cookies, with no text anywhere in the frame. The board design is credited to @boardandboozy in the original caption. The practical point: put a small spoon in every bowl. Fingers in a shared topping bowl are the fastest way to end the evening early.
# Add Stirrers and Spoons
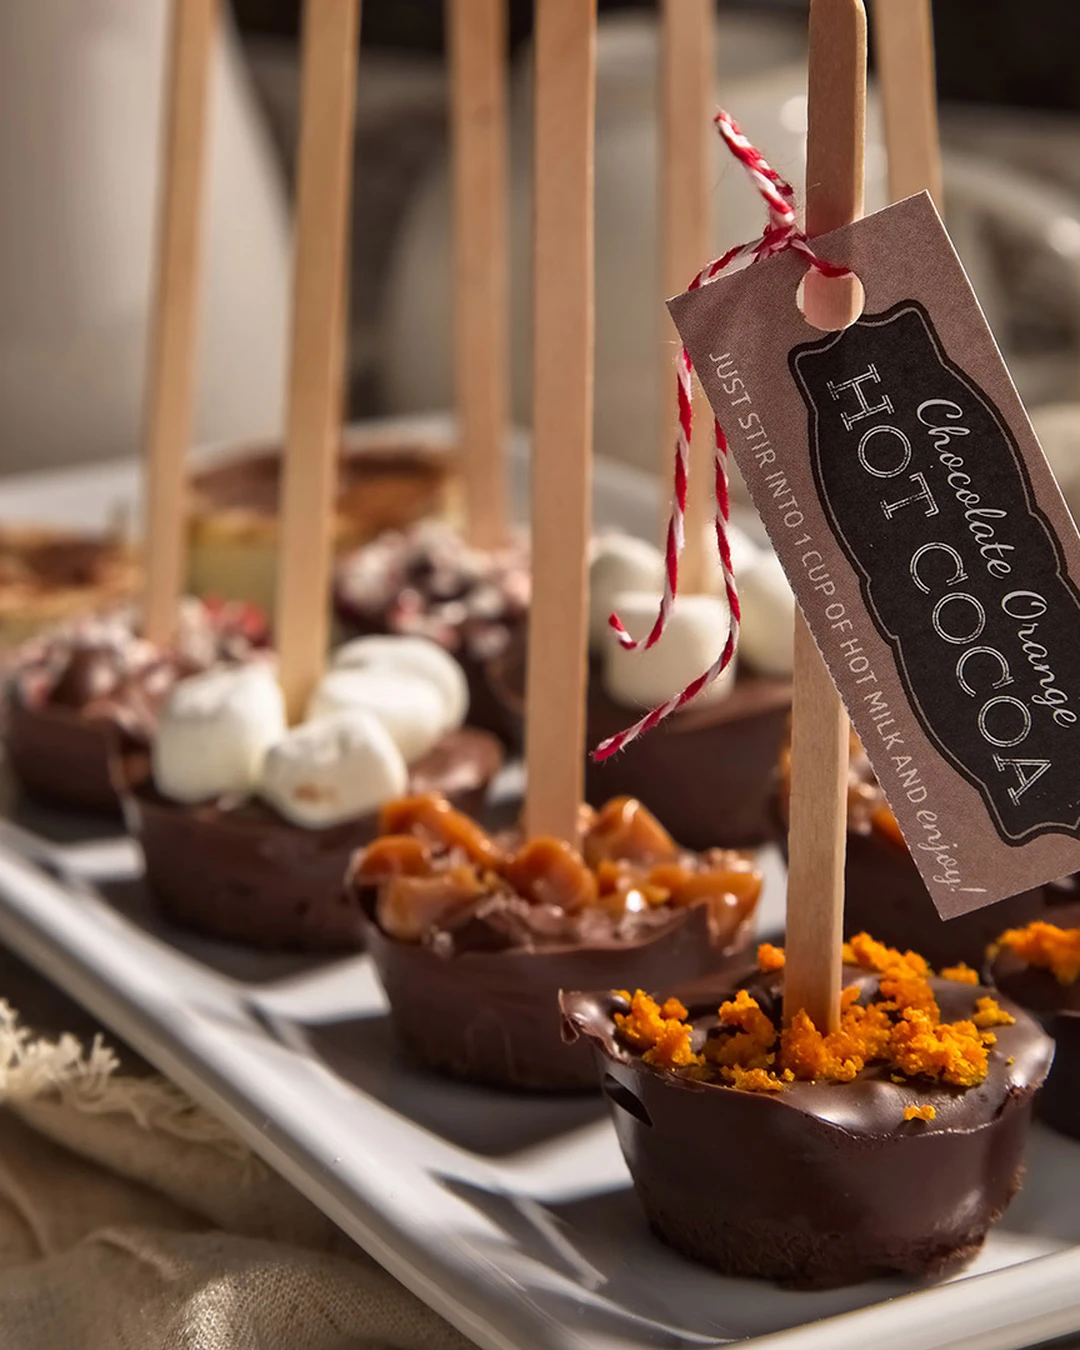
Stirrers do two jobs at once: they mix the cocoa, and they flavour it as they melt. Chocolate stirrers, candy cane sticks, and cinnamon sticks each change the drink a little, so a few kinds give guests a real choice. Stand them upright in a jar or lay them on a tray so they are easy to grab. In the photo, chocolate stirrers sit in cups topped with mini marshmallows, caramel pieces, and orange zest, and a large gift tag tied to the front stirrer reads “Chocolate Orange HOT COCOA — JUST STIR INTO 1 CUP OF HOT MILK AND enjoy!” The practical point: keep stirrers near the mugs, not near the toppings, so the flow of the bar runs in the order people actually use it.
# Keep the Hot Water Close
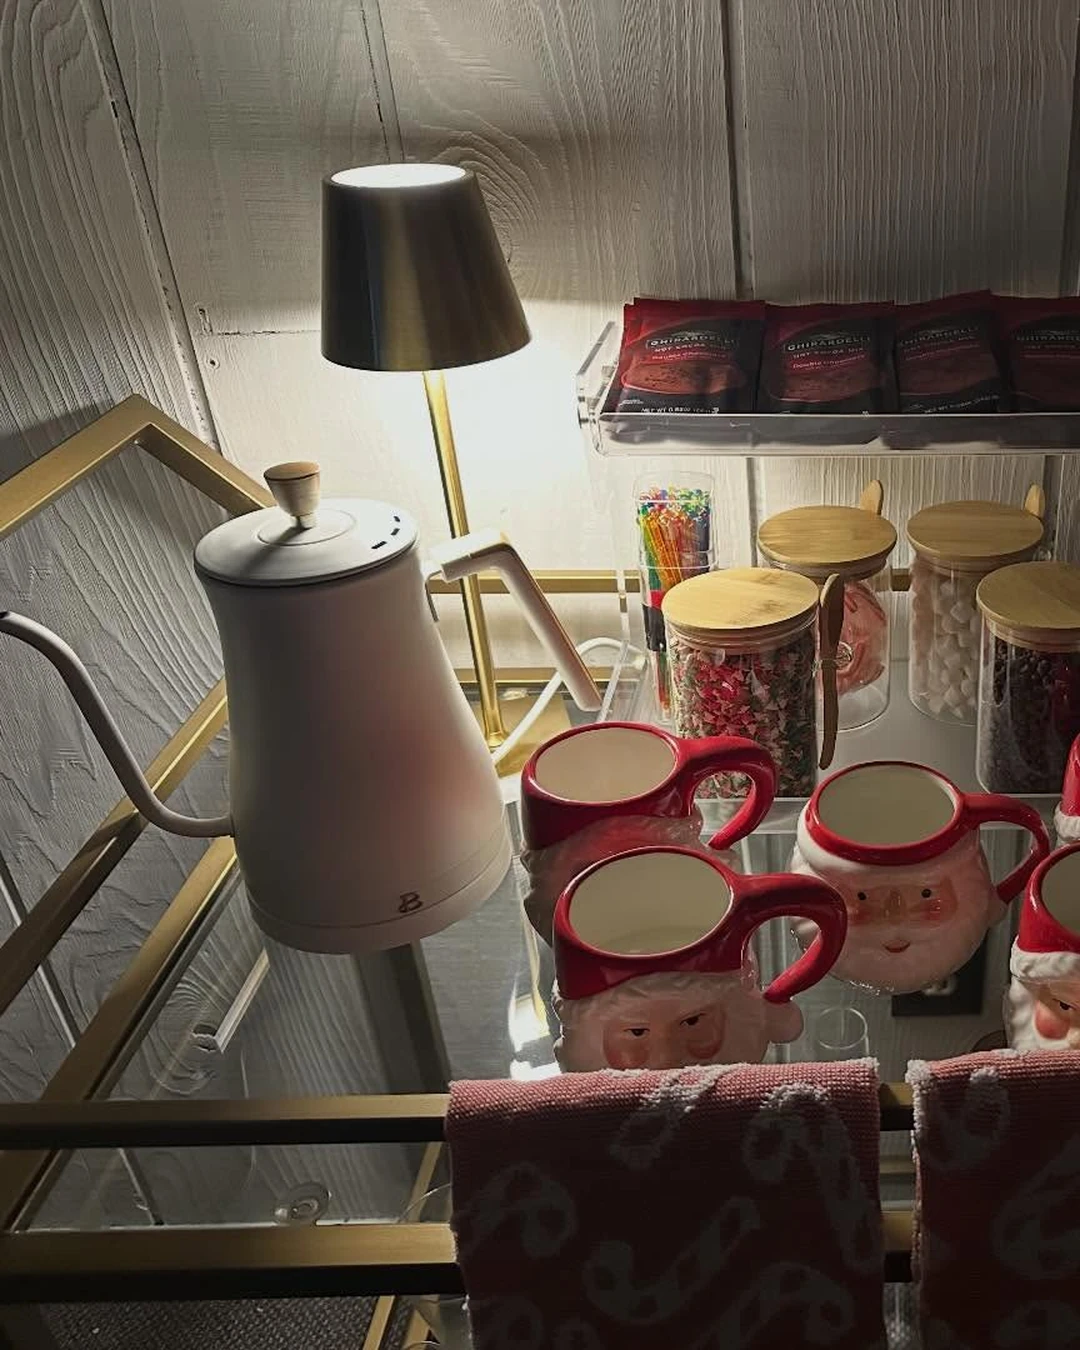
A cocoa bar fails the moment someone has to walk across the kitchen for hot water. Keep a kettle, a hot water dispenser, or a pot of hot milk right beside the bar, on the same surface if you can. An electric gooseneck kettle works well because it pours slowly and looks tidy sitting out. In the photo, a white gooseneck kettle sits on the left of a beverage cart, next to Santa mugs and jars of sprinkles, marshmallows, and candy canes, with Ghirardelli cocoa packets in a holder at the back. The practical point: fill the kettle before guests arrive, and keep a folded towel nearby for the inevitable splash.
# Label Every Jar
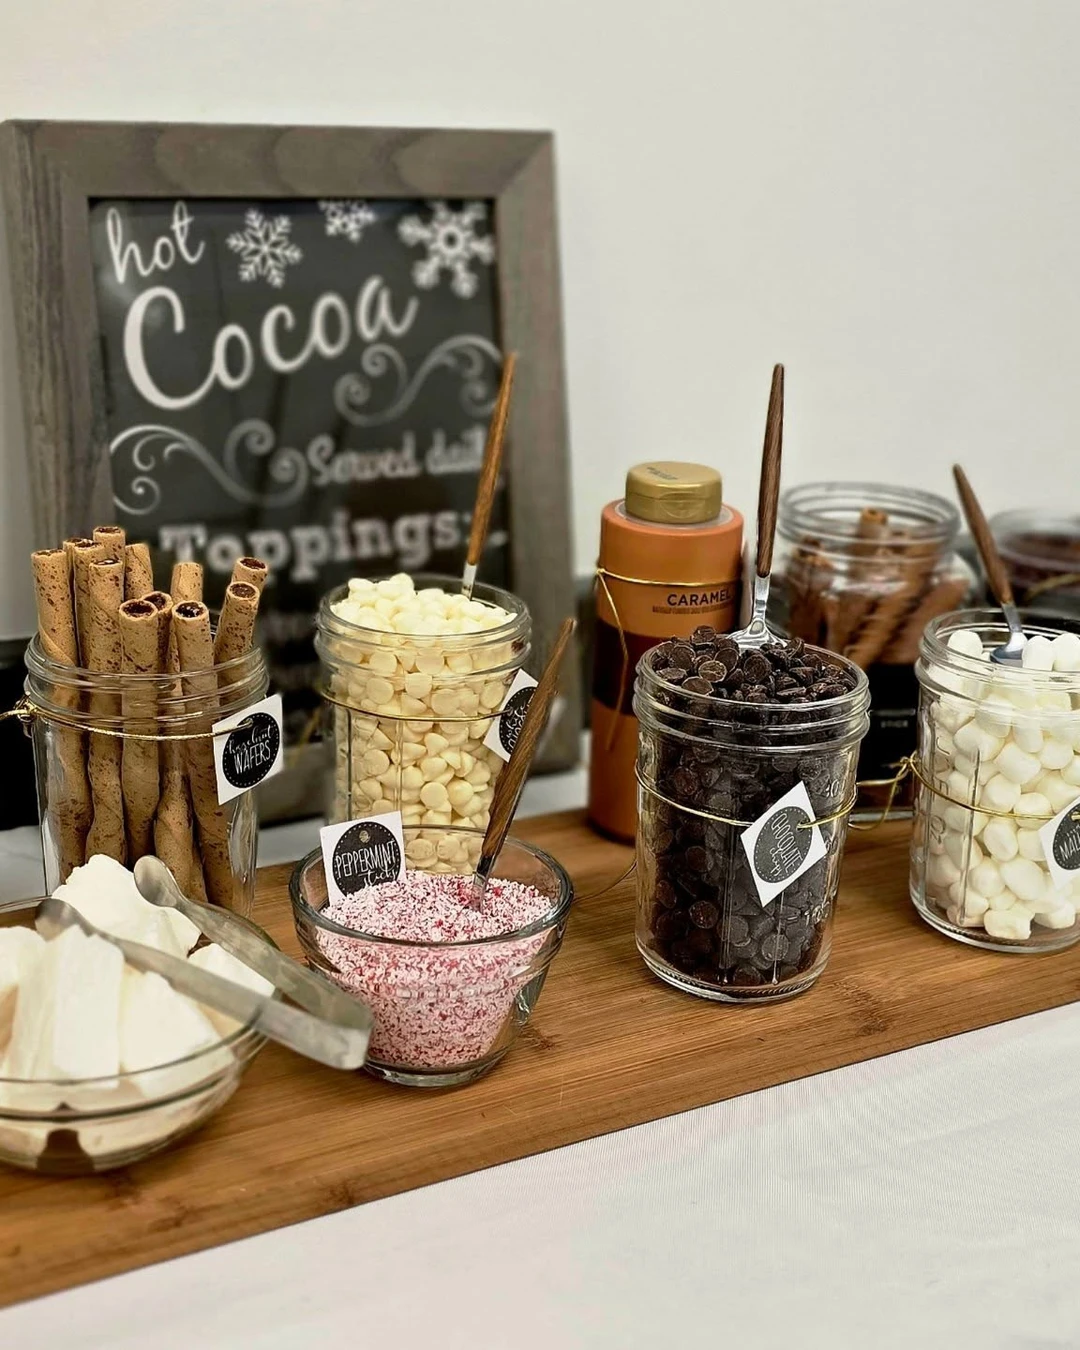
Labels are small, but they change how the bar feels. When every jar is labelled, guests do not have to open lids and guess, and the bar looks finished instead of improvised. Small twine tags, chalkboard labels, or printed stickers all work — pick one style and use it on every jar. In the photo, glass jars on a wooden board carry small black-and-white tags reading “hazelnut WAFERS”, “CHOCOLATE CHIPS”, “MALLOWS”, and “PEPPERMINT sticks”, with a framed chalkboard behind the board that reads “hot Cocoa Served daily Toppings:”. The white-chocolate tag is partly hidden behind its spoon, and a caramel sauce bottle stands behind the jars. The practical point: write the label before you fill the jar, not after. Cocoa powder and crushed peppermint look alike once they are in identical jars.
# Add Seasonal Greenery
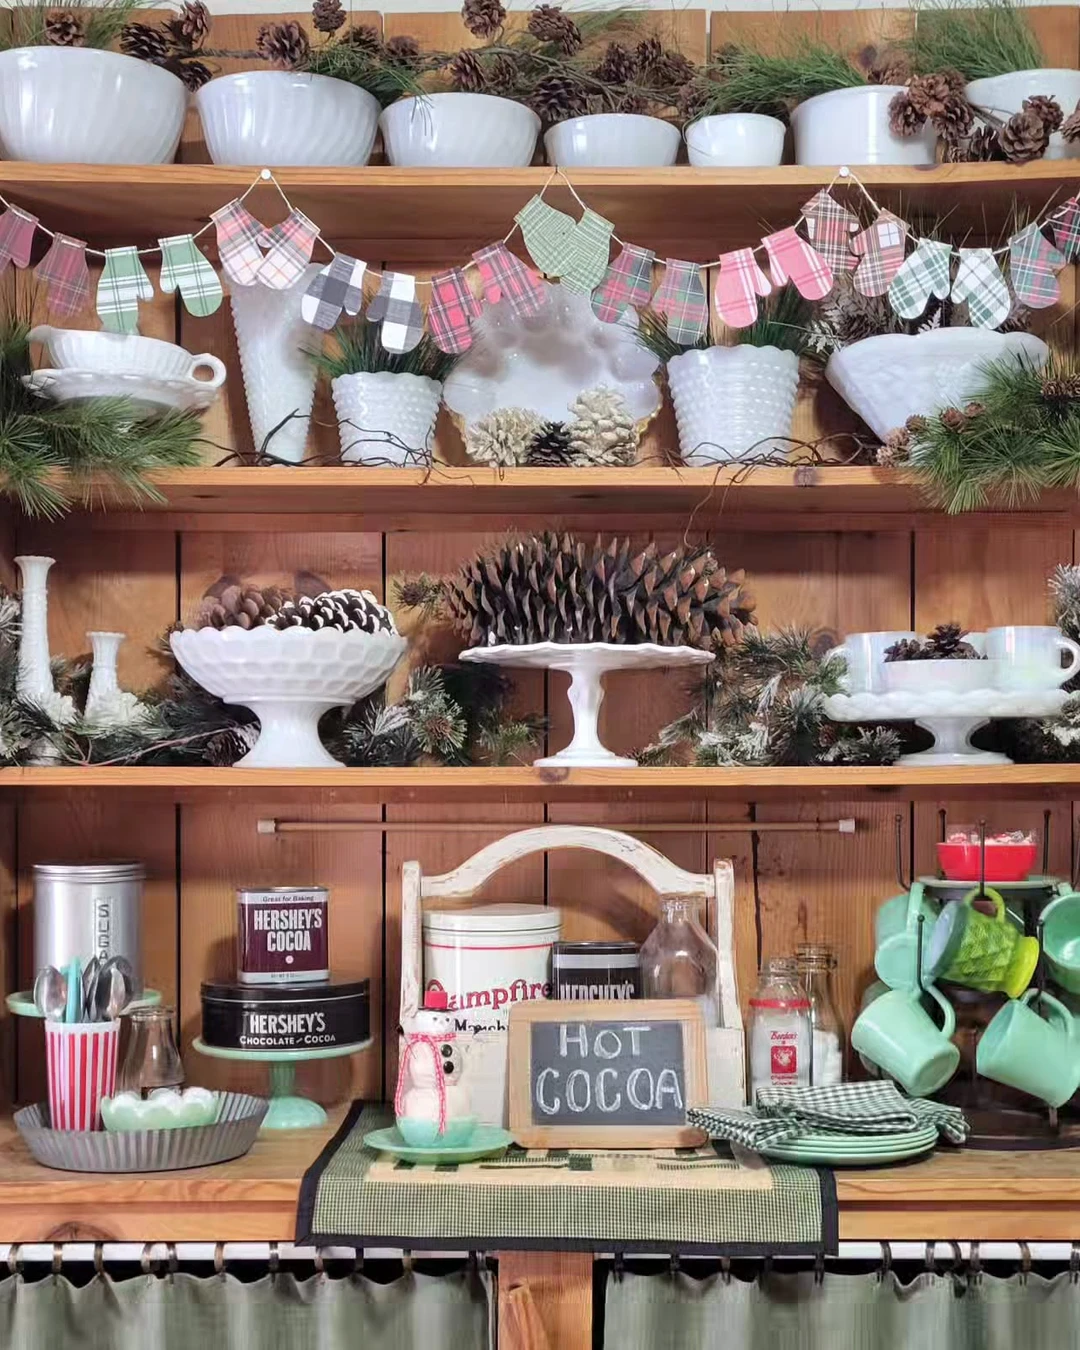
A little greenery keeps a cocoa bar from looking like a shop display. Pine branches, eucalyptus, pinecones, or a small garland soften the edges of the jars and trays and tie the bar to the season. Tuck greenery behind the jars rather than in front of them, so nothing blocks the labels. In the photo, a wooden hutch is styled as a winter cocoa station, with pine cones and pine branches on every shelf above the cocoa counter. A small hand-lettered chalkboard reading “HOT COCOA” sits on the counter, and Hershey’s Cocoa tins are part of the display. The practical point: use greenery you already have. A few cut branches from the garden look better than a plastic garland bought in a rush.
# Light It Up Warmly
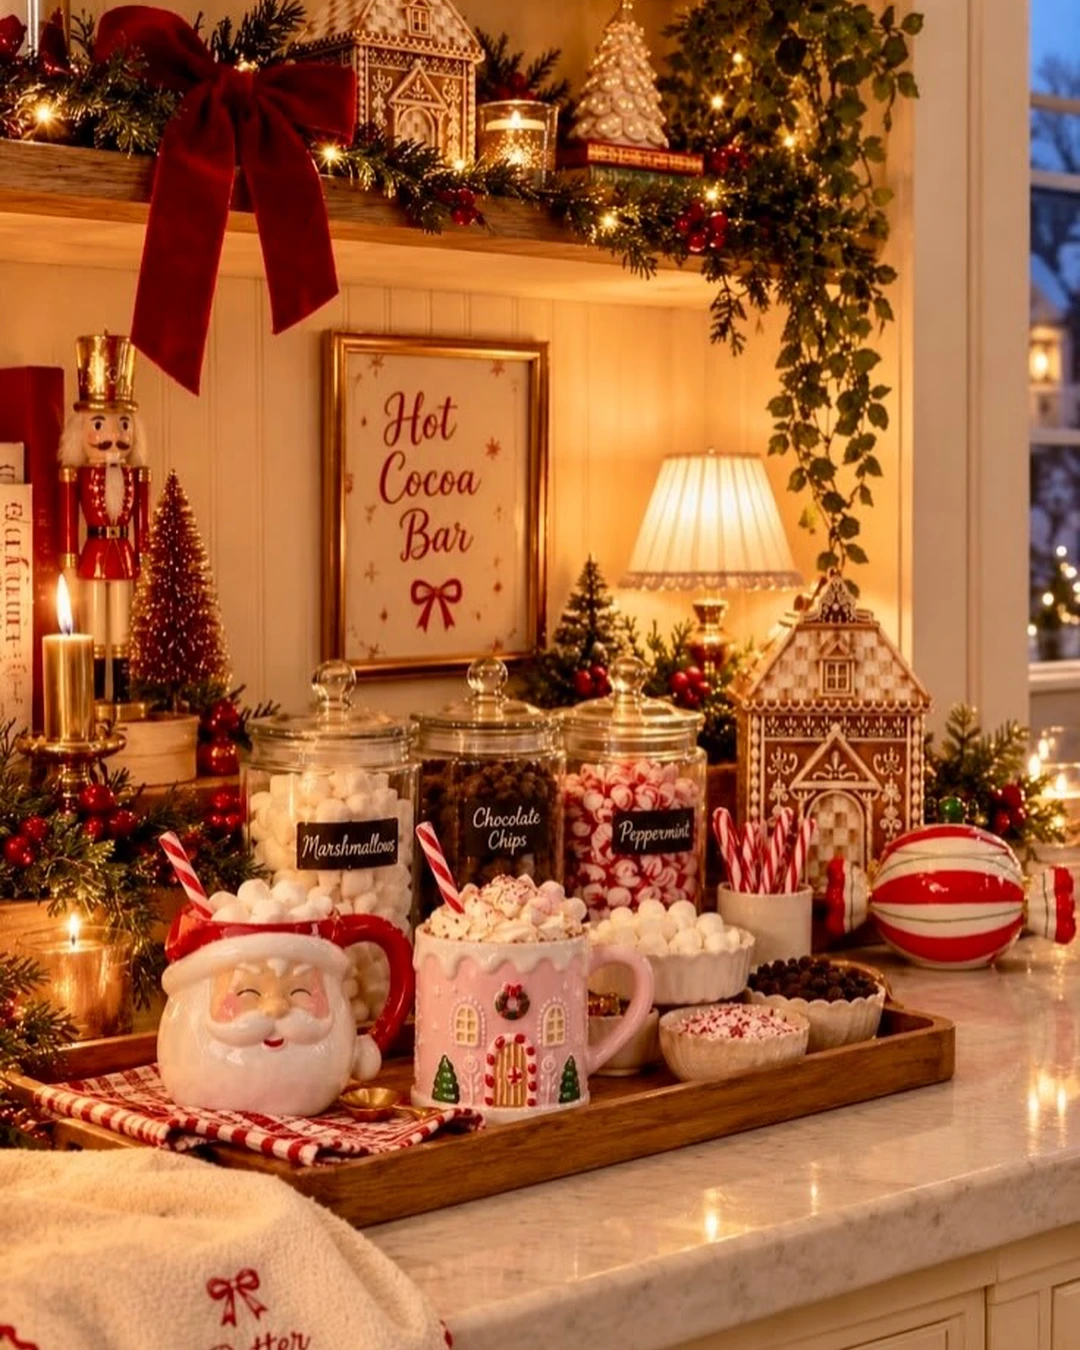
Warm light is what makes a cocoa bar feel cosy after dark. Of all the hot cocoa bar ideas here, lighting is the cheapest way to make the bar feel special. Fairy lights along a garland, a lit candle, or a small table lamp all work, and they cost almost nothing. Keep flames away from paper tags and napkins, and use battery candles if children will be reaching across the bar. In the photo, a kitchen-counter bar glows with lit candles, a table lamp, and fairy lights woven through a garland, with a framed “Hot Cocoa Bar” sign on the wall and Santa and house-shaped mugs full of whipped cream and marshmallows. The practical point: one warm light source is enough. Two or three small ones beat one bright overhead light every time.
# Include a Sweet Treat
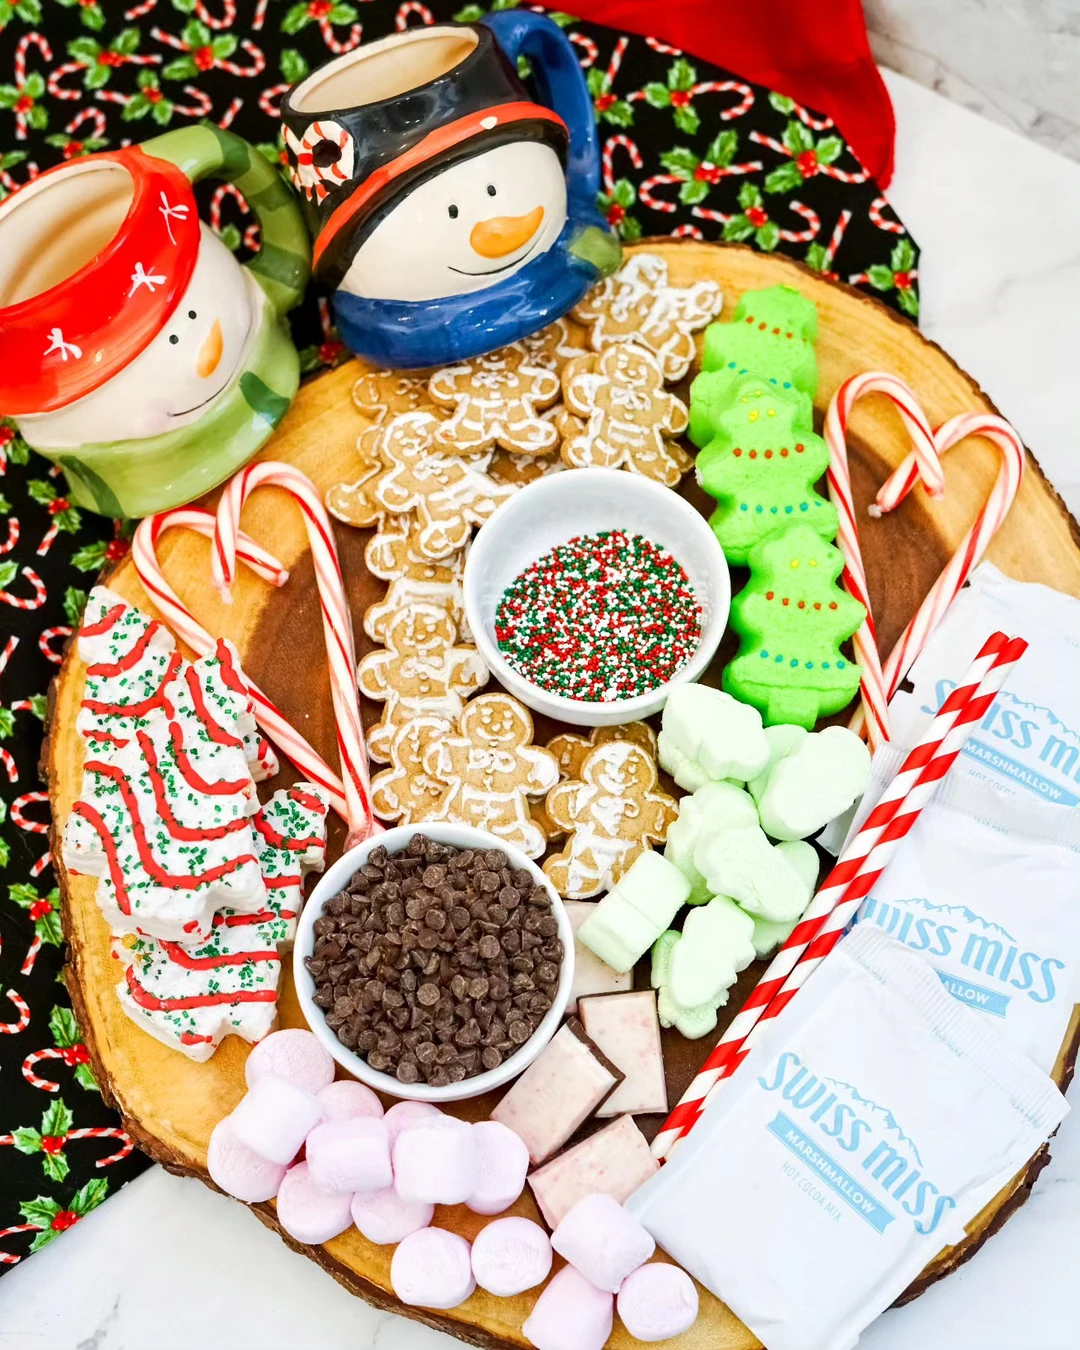
A cookie or two beside the cocoa turns a drink into a pause. Gingerbread men, biscotti, shortbread, or a small plate of peppermint bark all sit well next to a mug, and they give guests something to hold while the cocoa cools. In the photo, a wooden board holds gingerbread cookies, tree-shaped marshmallows, candy canes, peppermint bark, and two snowman mugs, with Swiss Miss hot cocoa packets laid out on the board. The packets carry legible brand text, and the board is a flat-lay rather than a standing bar. The practical point: choose treats that do not crumble into the cocoa. A sturdy biscotti survives dipping; a delicate cookie does not.
# Make It Kid-Friendly
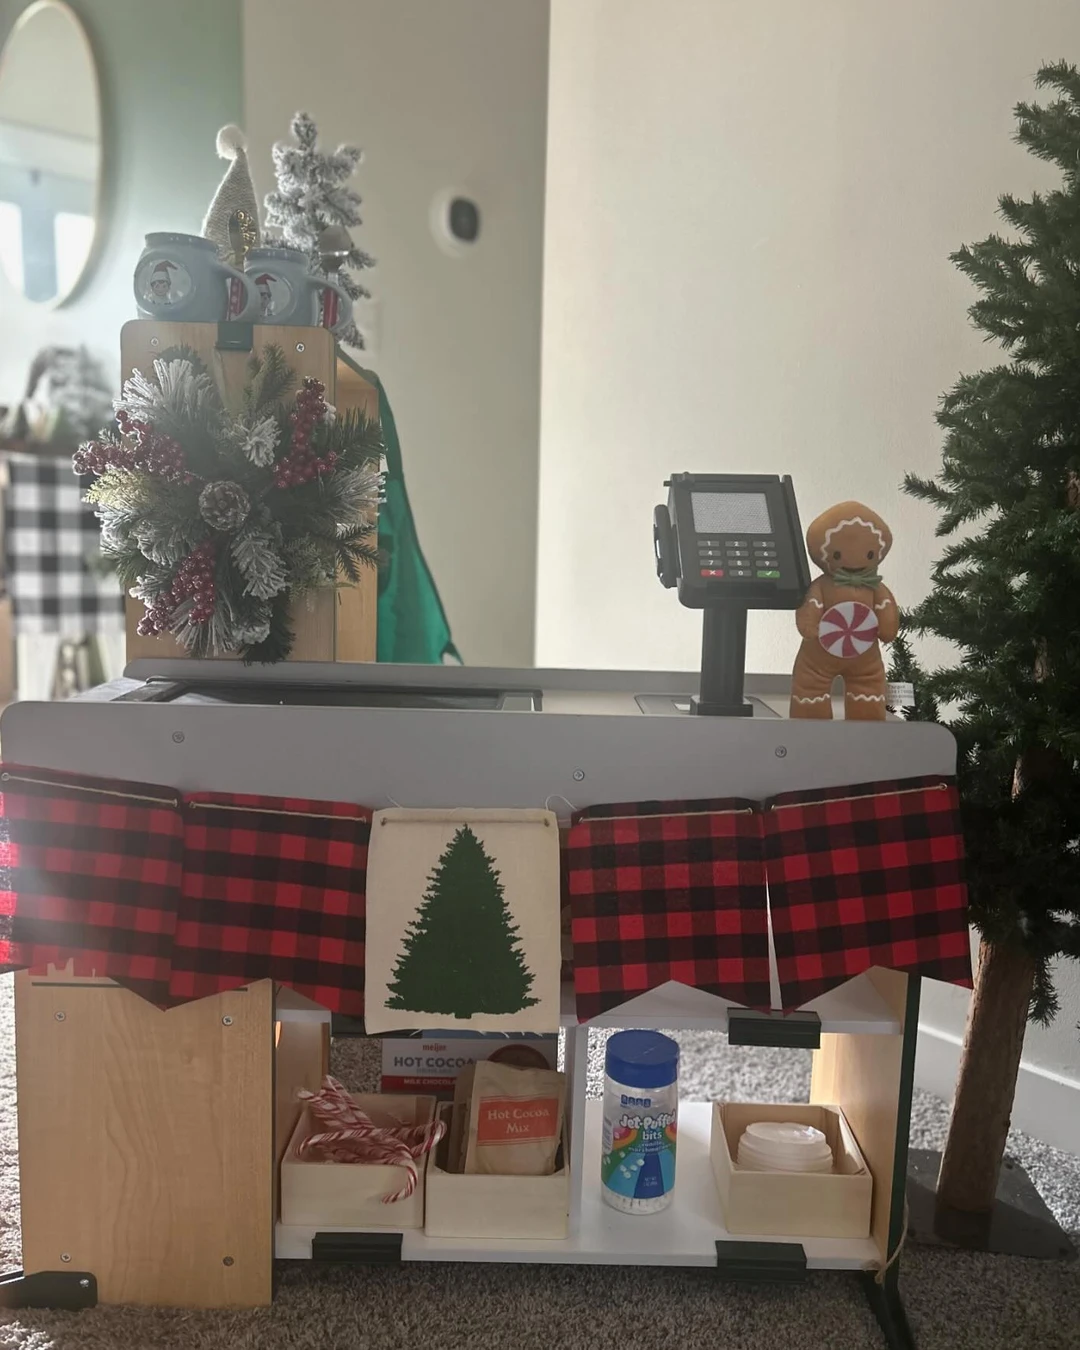
Children love a cocoa bar, but only if they can reach it. Set a small section at their height — a low shelf, a tray on a side table, or a few unbreakable cups — and keep the hot water and the kettle on the adult side. Small mugs, plastic cups, and toppings in shallow bowls let children build their own cup without help. In the photo, a child’s wooden play market stand is styled as a Christmas cocoa shop, with elf mugs, candy canes, and a “Hot Cocoa Mix” bag on the low shelf. No child is visible in the photo, and the stand is a play stand at child height rather than a full-size bar — which is exactly the point. The practical point: give children their own spoon and their own topping bowl. Sharing the adult bowls is where the mess starts.
# Add a Cozy Runner or Cloth
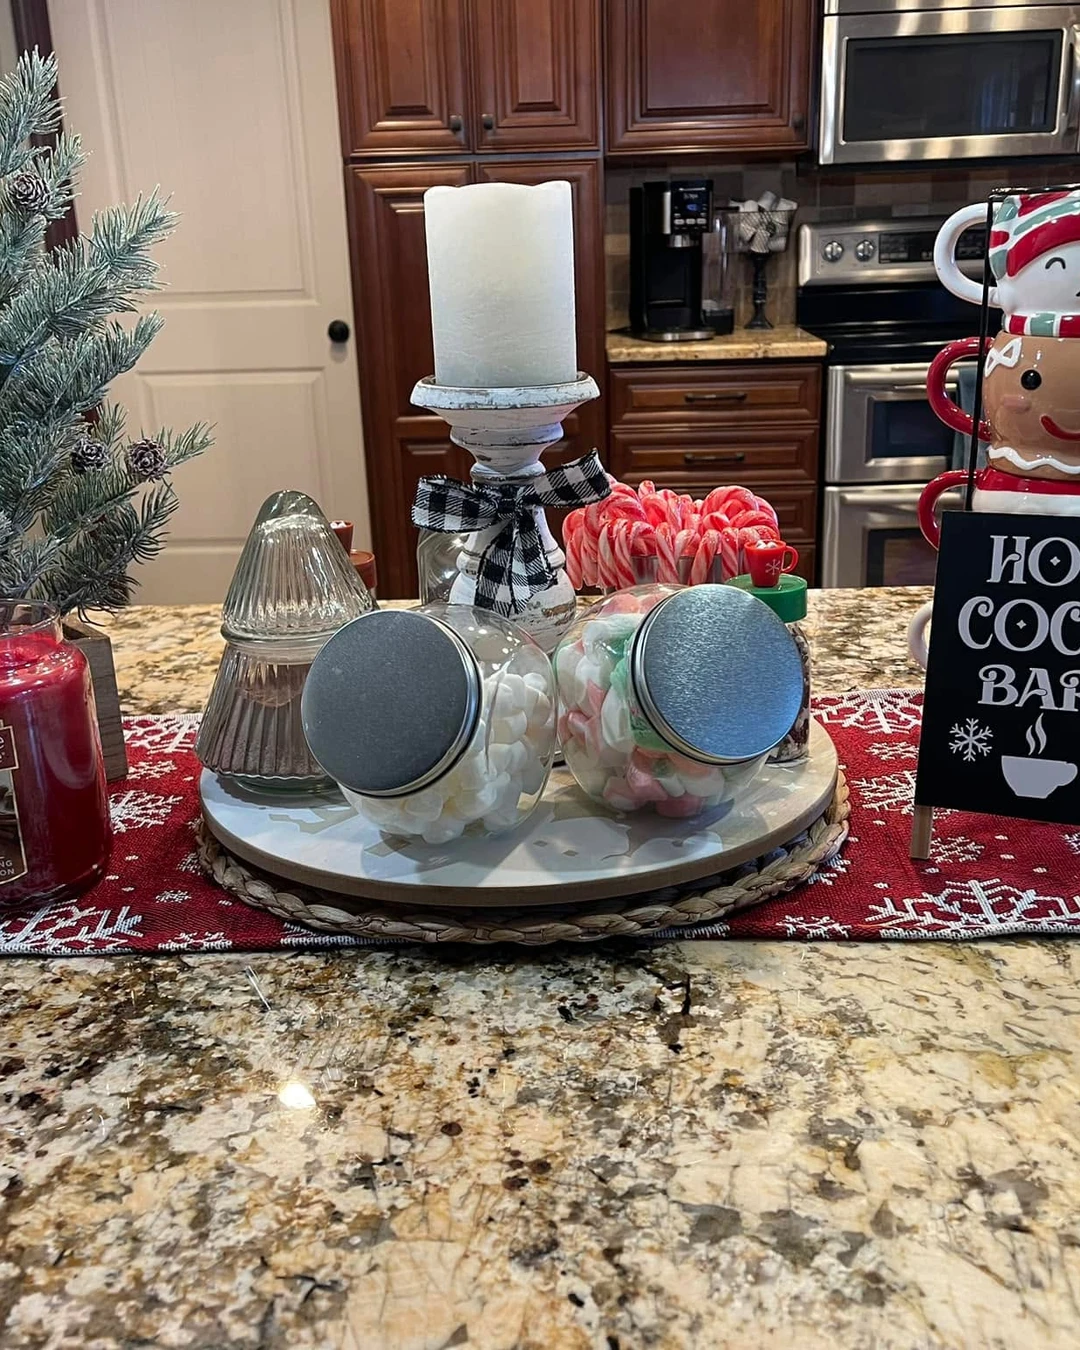
A runner or a cloth grounds the whole setup. It defines the bar’s space on the counter, protects the surface from drips, and adds colour and texture that bare wood or stone cannot. A red snowflake runner suits a Christmas bar; a plain linen runner works all winter. In the photo, a red snowflake-patterned runner runs under a kitchen-counter display of marshmallow jars, stacked snowman and gingerbread mugs, and a lit candle. A black “HOT COCO BAR” chalkboard sign at the right is partly cut by the crop. The practical point: pick a runner you can wash. Cocoa splashes are a matter of when, not if.
# Hang a Hot Cocoa Sign
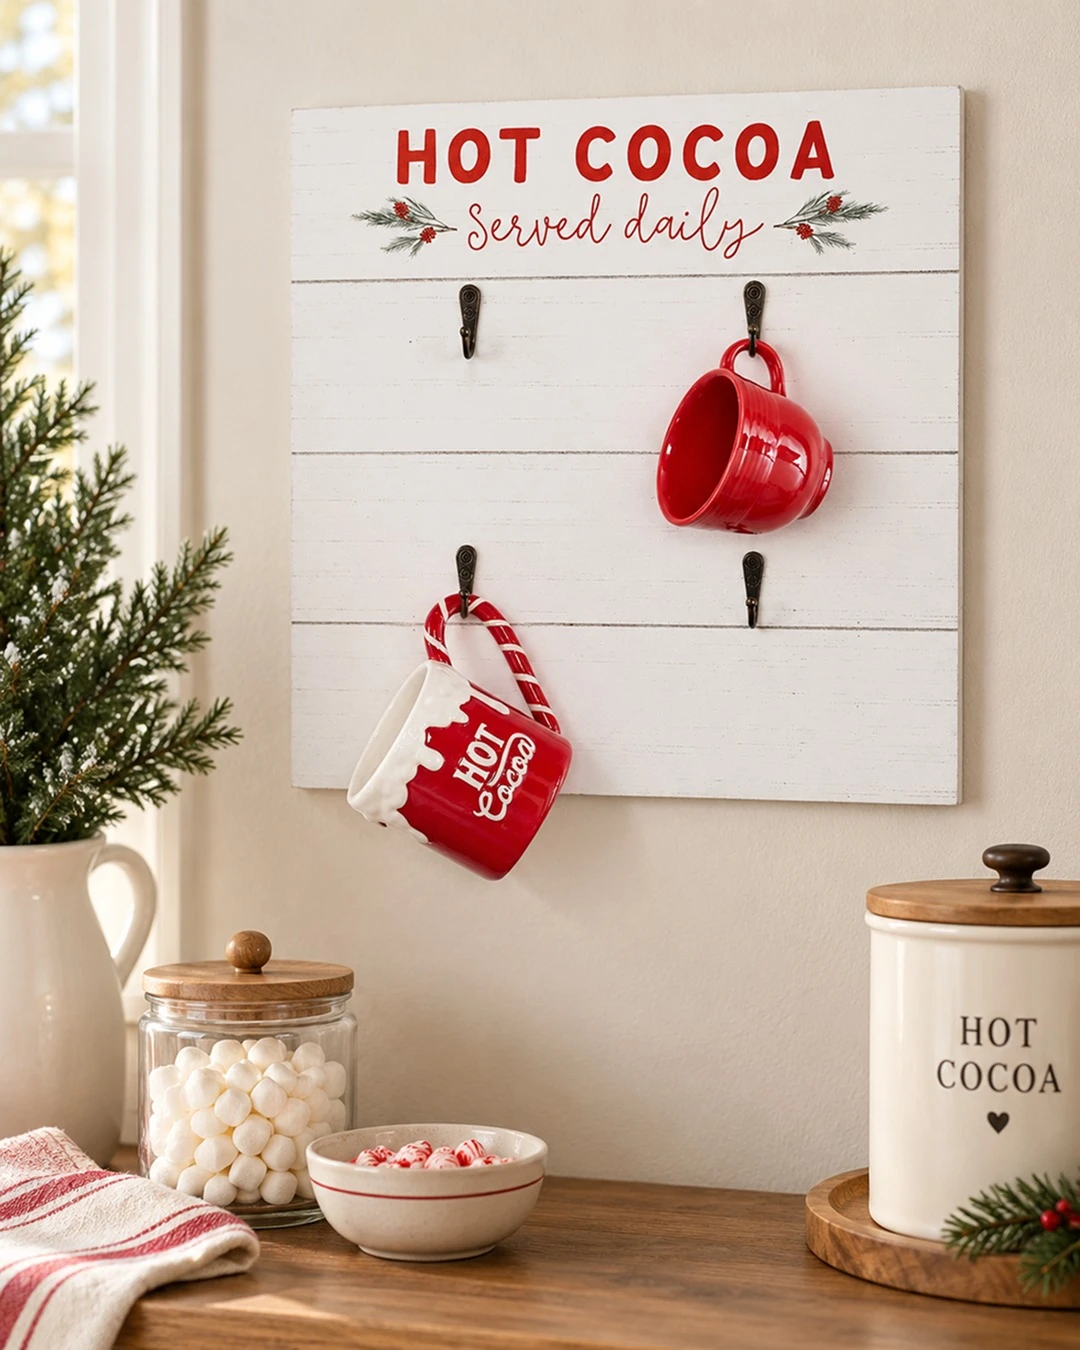
A sign tells guests what the station is before they ask. It can be a framed print, a chalkboard, or a wooden plaque, and it works best hung on the wall behind the bar or propped up at the back of the counter. Keep the wording short — “Hot Cocoa” and a small illustration are enough. In the photo, a white wooden wall sign reads “HOT COCOA Served daily” in red lettering, with two red mugs hanging from its hooks and a marshmallow jar and a peppermint bowl on the counter below. The photo is a brand showcase of the sign, but the setup itself is real and styled. The practical point: hang the sign where it can be read from the doorway. If guests have to lean over the jars to read it, it is too low.
# Stock It for Guests
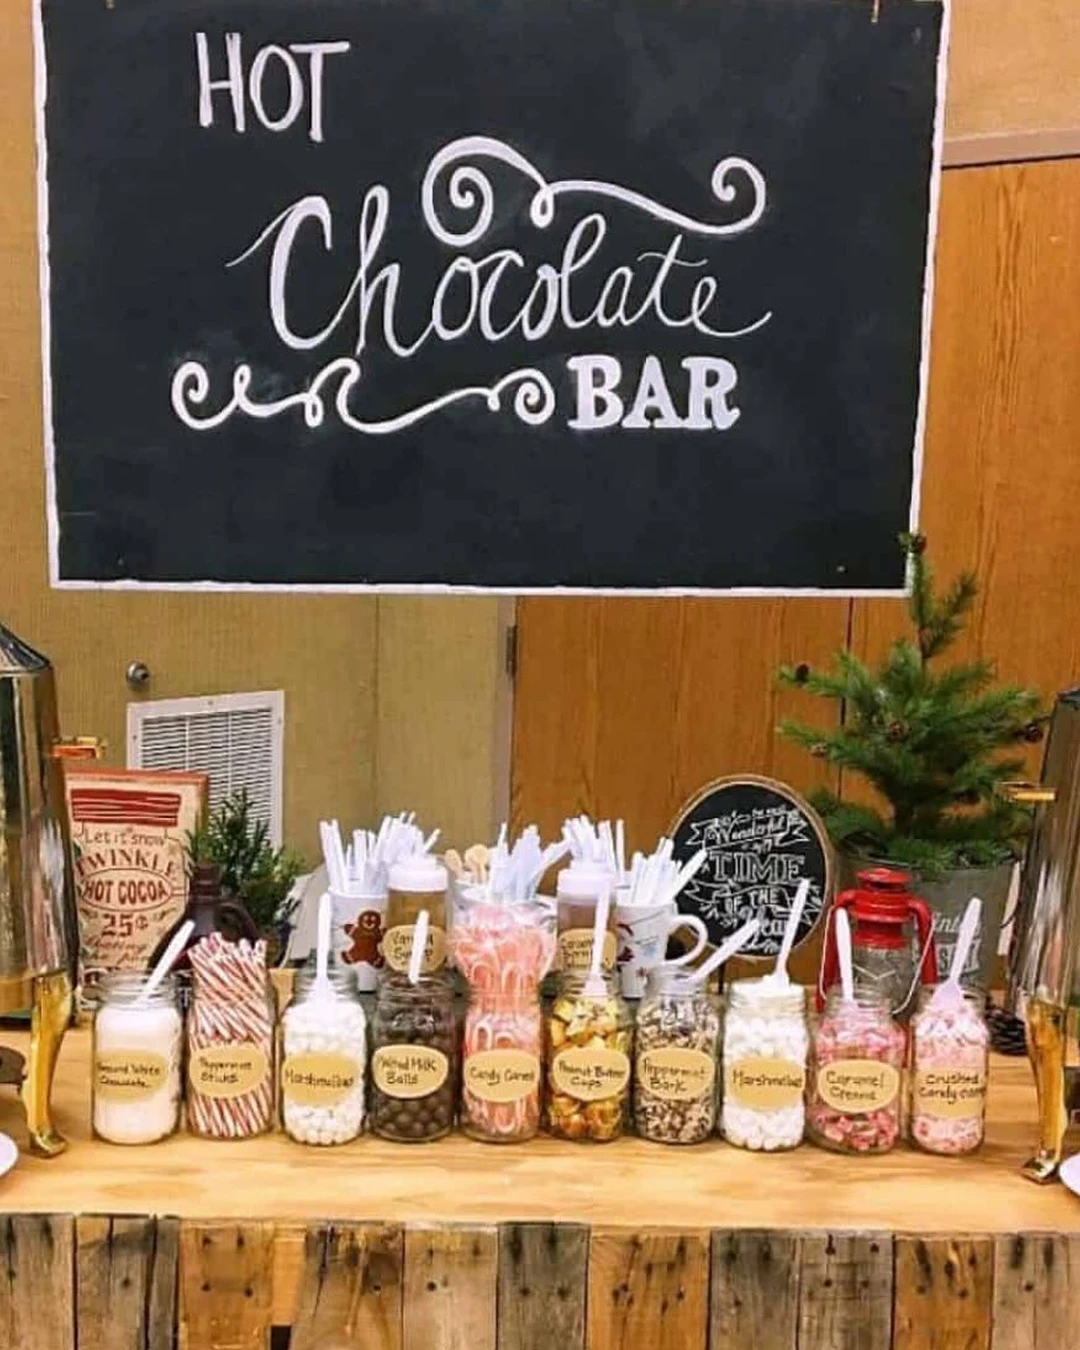
A bar for guests needs more of everything — more mugs, more toppings, more cups, and a clear order of use. Lay the supplies out in the order people need them: mugs first, then cocoa, then hot water, then toppings, then stirrers. That single line of flow stops the bottleneck that forms when everyone reaches for the same jar. In the photo, a generous self-serve bar on a rustic wooden table has two beverage dispensers and ten labelled topping jars, from marshmallows and candy canes to peanut butter cups and crushed candy cane, with a big chalkboard reading “HOT Chocolate BAR”. This is a mobile bartender’s event setup rather than a home counter, which is why it is so fully stocked. The practical point: count the mugs before the evening starts. Running out of mugs is the one shortage guests actually notice.
# Keep the Bar Tidy
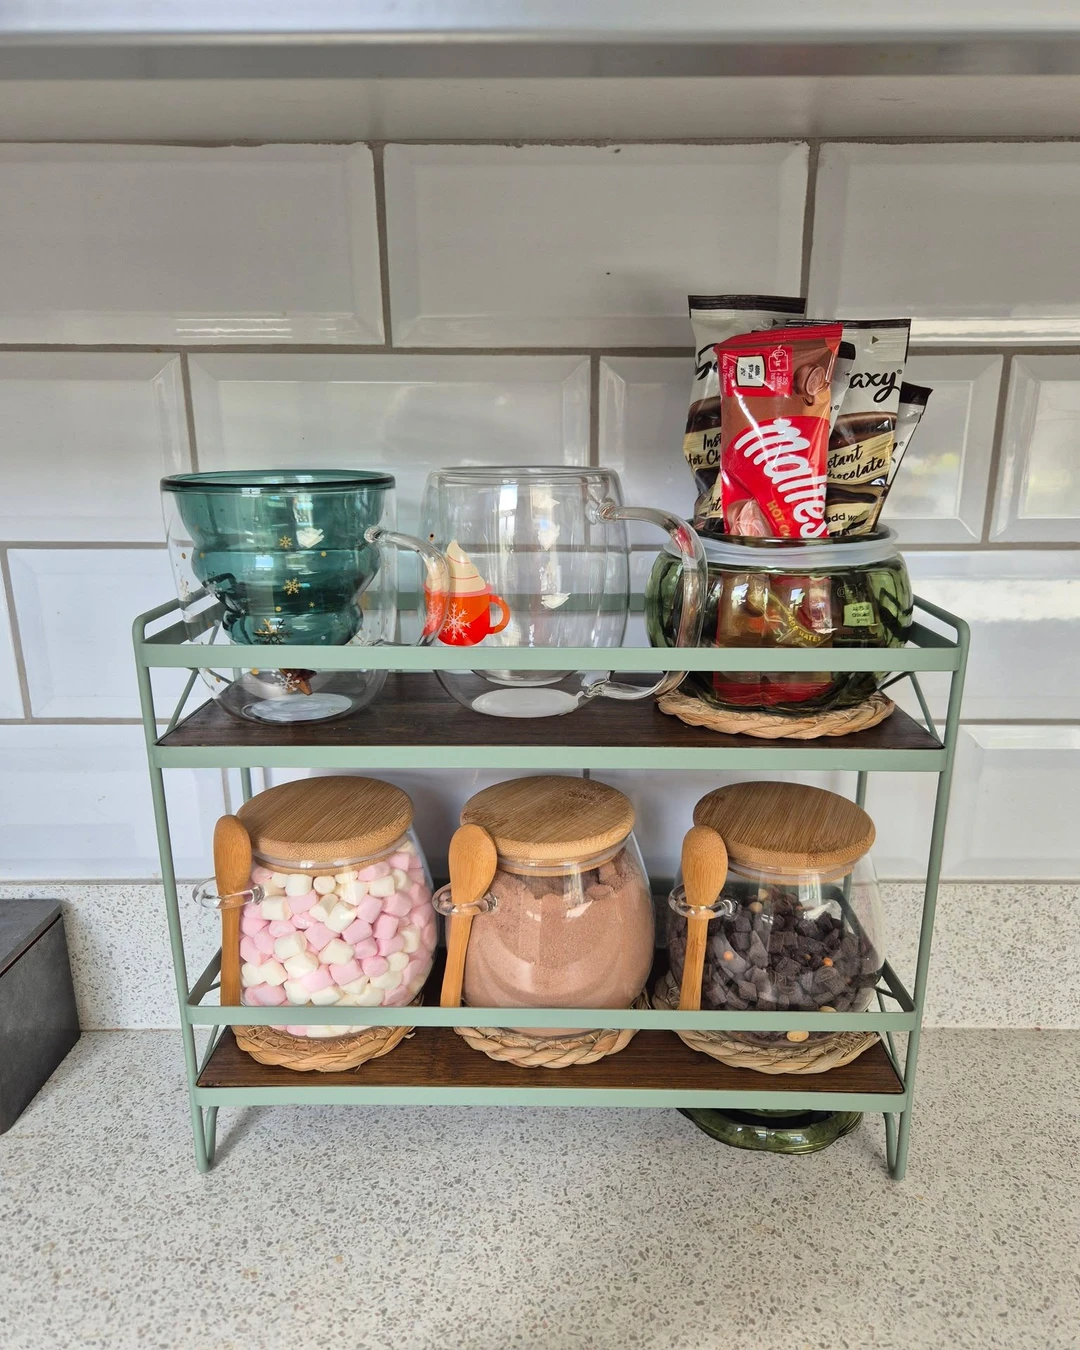
A tidy bar is a usable bar. When every jar has a home and every spoon has a place, guests serve themselves without moving things around, and the bar still looks good halfway through the evening. A two-tier organiser or a tray with fixed spots for each jar does most of the work. In the photo, a sage-green two-tier organiser on a kitchen counter holds two glass mugs and a jar of hot-chocolate sachets on the top shelf, with three matching glass jars on the bottom shelf — pink and white mini marshmallows, cocoa powder, and chocolate chunks — each with its own wooden spoon. The jars carry no labels, so the contents speak for themselves, and the sachet packets on the top shelf show small brand packaging. The practical point: leave one empty spot on the tray. It gives you somewhere to put the used spoon, the empty packet, or the mug that needs refilling.
# Style It for the Season
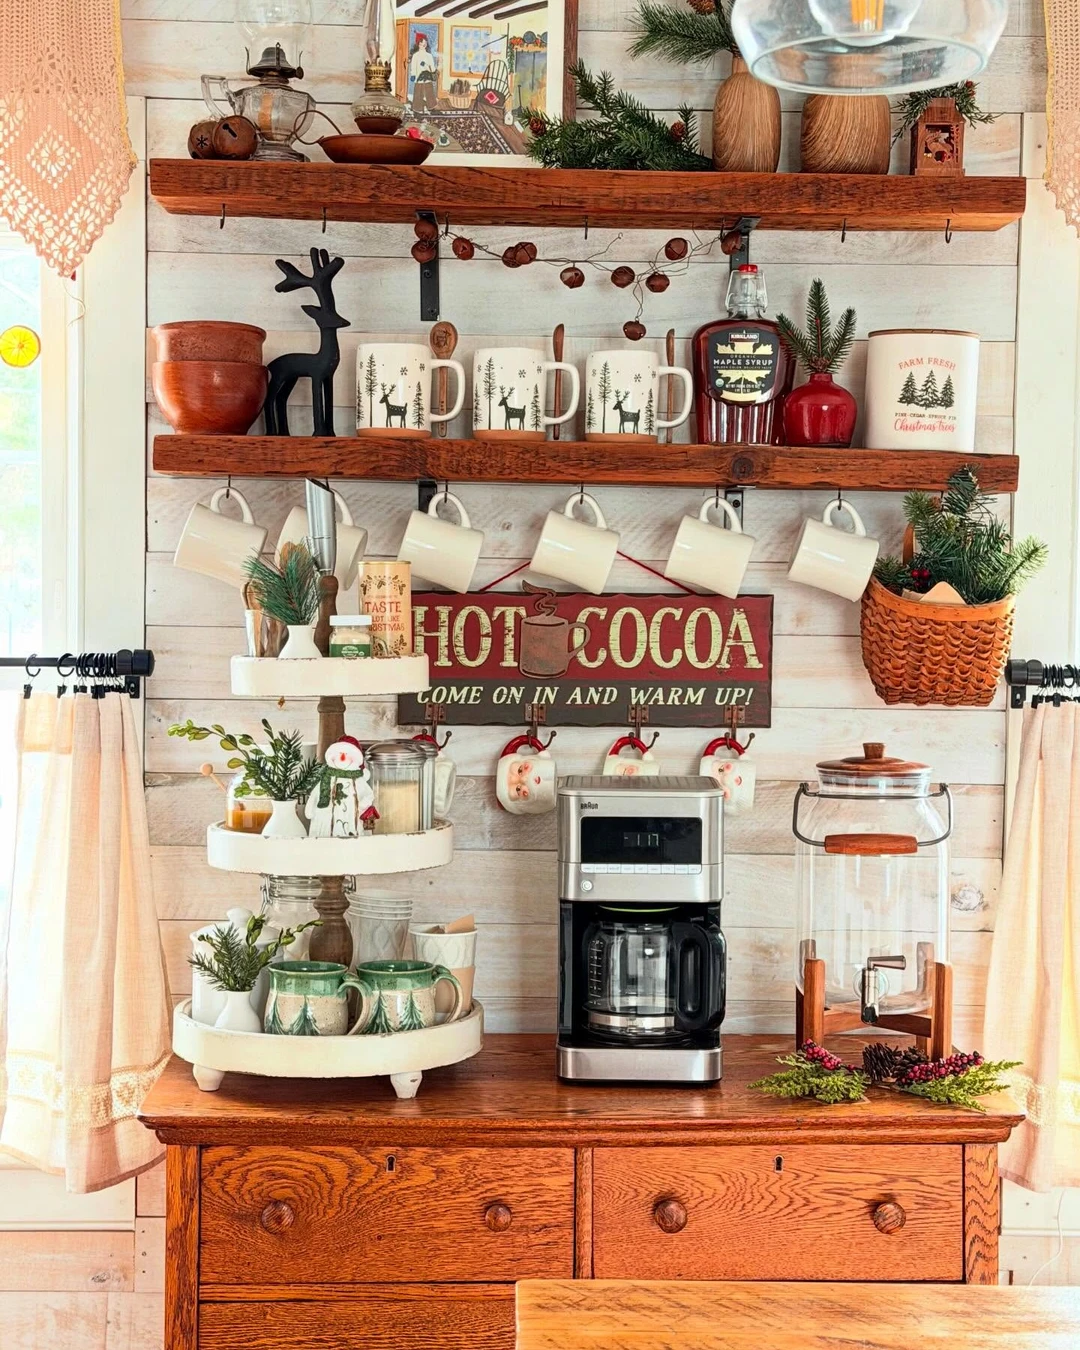
The last step is the one that makes the bar feel like part of the home rather than a temporary table. Add the season’s touches — a garland, a mini tree, stockings, ornaments, or a few red and green accents — and let the bar match the room around it. In the photo, a Christmas cocoa bar sits on a wooden dresser against white shiplap, with pine garlands on the floating shelves, deer mugs, a “HOT COCOA COME ON IN AND WARM UP!” sign, and a three-tiered stand with a snowman figurine. A Kirkland maple-syrup bottle label is visible on the shelf. The practical point: style the bar once, then leave it alone. A bar that is rearranged every day never settles into looking like it belongs.
Let the Cocoa Bar Do the Welcoming
A beautiful hot cocoa bar is not about buying the most things. These hot cocoa bar ideas are about a good spot, a tray that gathers everything together, mugs worth reaching for, and toppings that are easy to find and easy to use. Set it up once, keep the hot water close, and let guests build their own cup while you enjoy the evening with them. For more seasonal styling around the home, see The Art of Styling a Christmas Coffee Table With Seasonal Charm.