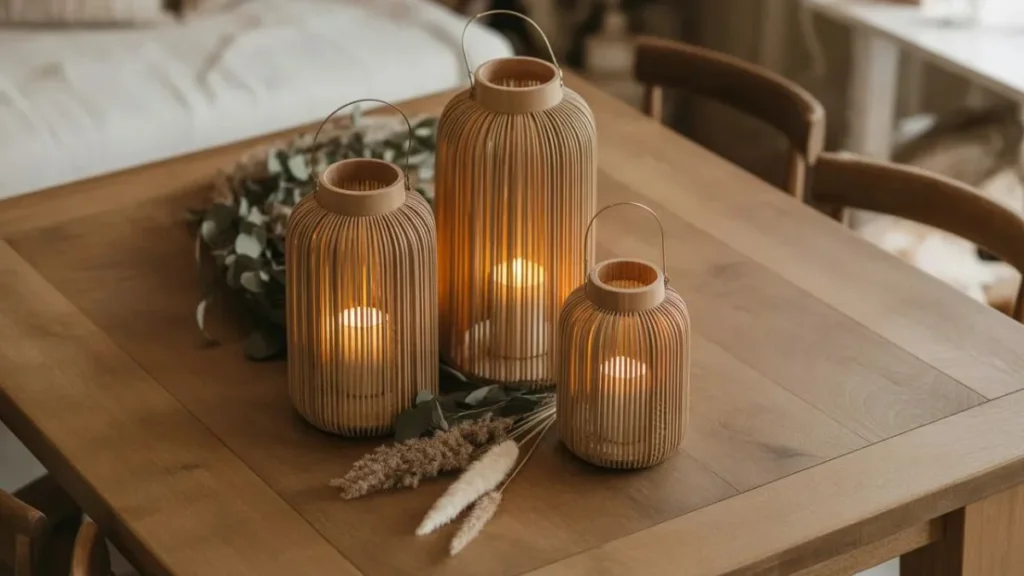
Store-bought lanterns are fine. But a handmade wooden lantern that you built yourself — stained to match your exact decor, sized perfectly for your porch, and customised with your own finishing touches? That’s something else entirely. DIY wood lantern ideas have exploded in popularity for one simple reason: they look expensive, but most can be made from scrap wood for nearly nothing.
Whether you’re a total beginner who’s never held a nail gun or a seasoned woodworker looking for a weekend project, this list has something for you. These 12 ideas range from beginner-friendly stackable frames to solar-powered outdoor versions built for all-weather use. All of them are genuinely buildable in a weekend — no industrial workshop required.
What You Need Before You Start
You don’t need a full workshop to build beautiful DIY wood lanterns. Most of these projects require only a handful of basic tools and materials — many of which you might already own.
Basic Tools
- Miter saw or miter box (for accurate angle cuts)
- Nail gun or power drill with trim-head screws
- Wood glue (waterproof formula for outdoor lanterns)
- Sandpaper: 80-grit and 220-grit
- Clamps (essential for drying glued joints)
Common Materials
- Select pine boards, 2×2s, or 1×2 furring strips
- Scrap wood from previous projects (free!)
- Wood stain or chalk paint in your chosen finish
- Clear matte or satin polyurethane topcoat
- Flameless LED candles or fairy lights
- Solar lights (for outdoor versions)
Pro tip: For scrap wood projects, imperfections add character. Knots, grain variation, and small checks all contribute to that authentic, handcrafted look.
1. Classic Farmhouse Wood Frame Lantern
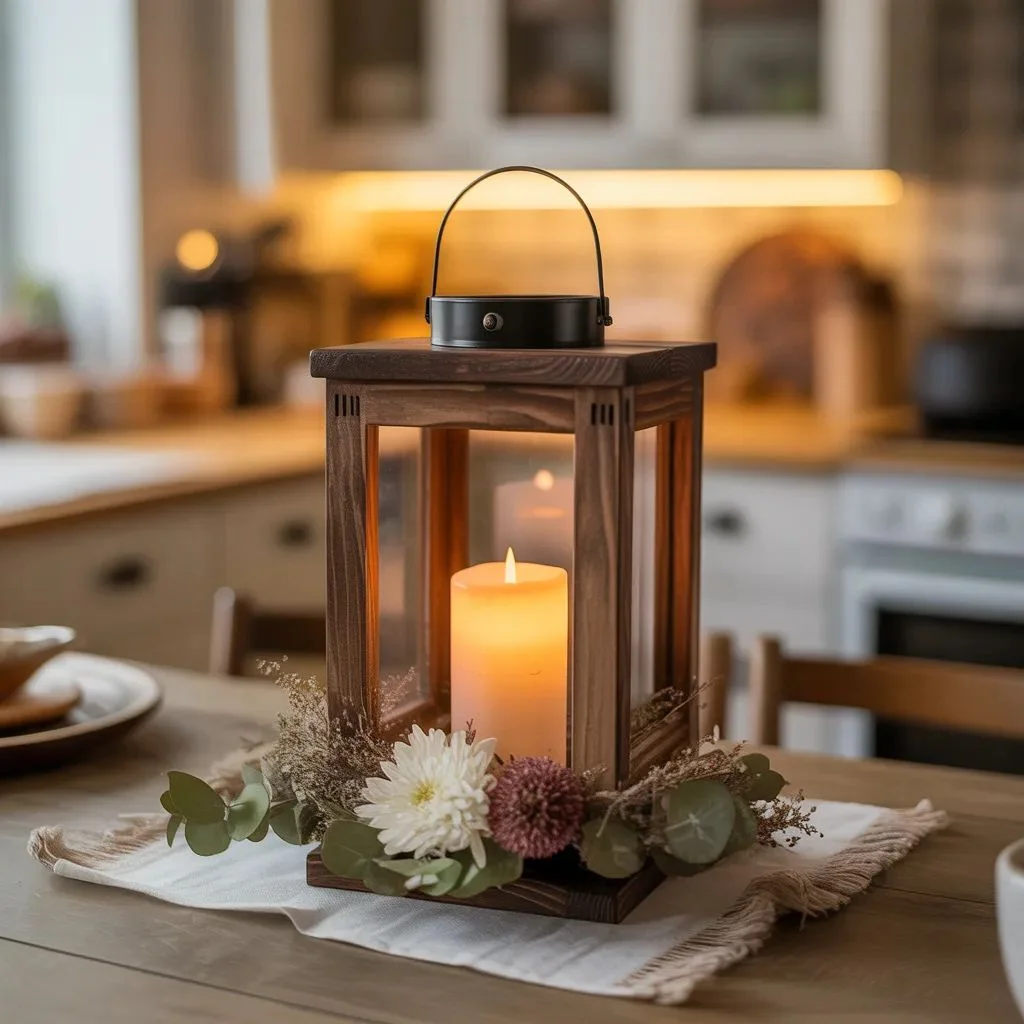
This is the entry-level DIY wood lantern idea that converts even total beginners into weekend woodworkers. The structure is a simple rectangular box frame built from 2×2 pine boards, assembled with wood glue and finish nails. The open sides let candlelight spill out beautifully, and the framed rooftop detail adds a farmhouse-chic finish that looks far more complex than it is.
Top the frame with stacked square wood blocks — starting wide at the base and tapering upward — to create the signature lantern silhouette. Sand smooth, then apply a warm walnut stain to bring out the grain. A flameless pillar candle inside completes the look instantly.
Best for: Dining table centrepieces, mantle styling, hallway console tables.
2. Scrap Wood Rustic Lantern
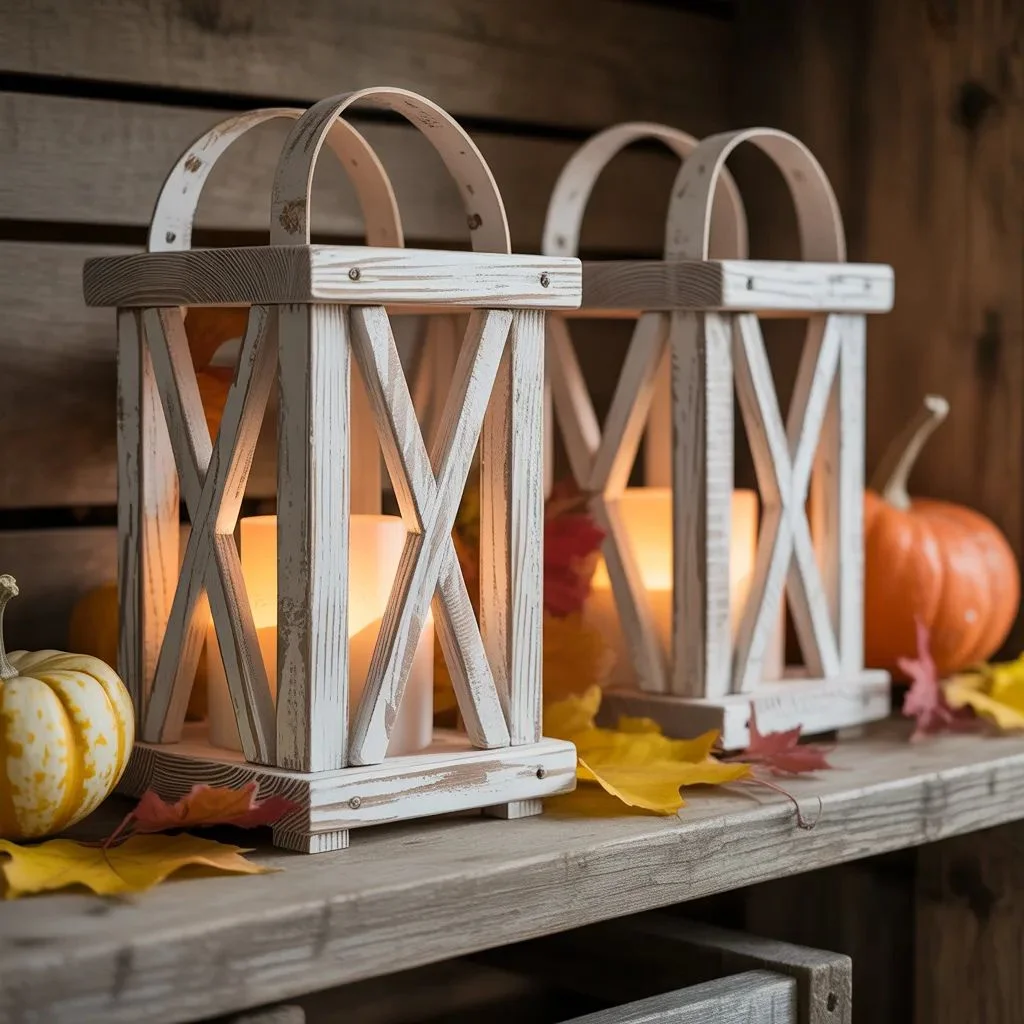
Got a pile of leftover timber sitting in your garage? These rustic DIY wood lanterns were practically invented for scrap-pile treasure hunters. The beauty of this design is that no two look the same — the character of each piece of reclaimed or leftover wood dictates the result.
Cut your scraps into consistent lengths, assemble into a four-sided frame, and add a simple square top and base. Apply an antique white or whitewash stain for a beachy vibe or go dark and dramatic with an ebony finish. These make excellent handmade gifts and work brilliantly as holiday decor when stuffed with seasonal foliage.
Cost: Near zero if you’re using scraps. One of the most budget-friendly DIY wood lantern ideas on this list.
3. Solar-Powered Outdoor Wood Lantern
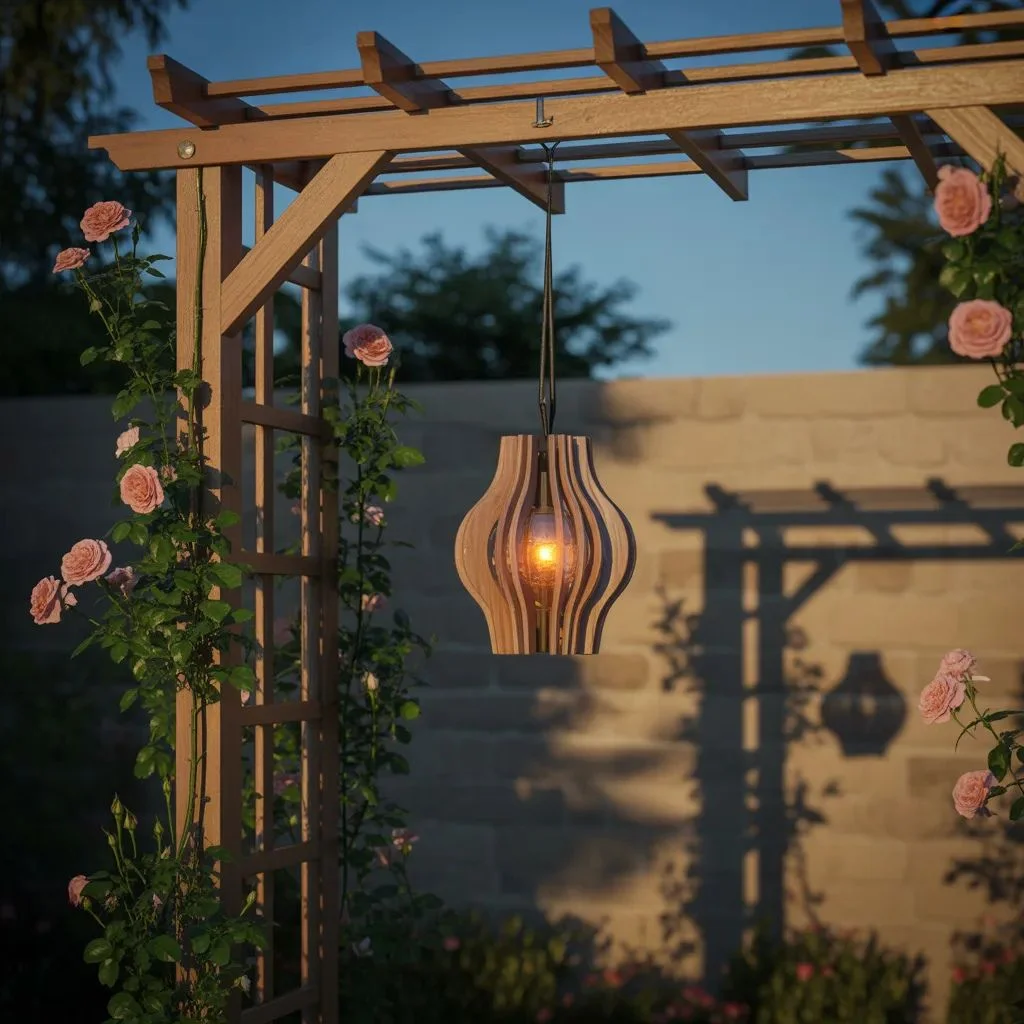
This is the DIY wood lantern idea for your garden, trellis, or back porch — and it runs entirely on solar power. A standard candle won’t survive the outdoors, but a fitted solar light globe drops right into the top of the lantern frame and casts a gorgeous glow at night, with bonus shadow patterns that dance across surrounding walls.
Build the frame from deck board timber (more weather-resistant than standard pine), apply an exterior-grade wood stain, and seal with a waterproof polyurethane topcoat. Attach rope through drilled top holes for a hanging version or place directly onto porch steps. The shadow the solar globe casts at dusk is genuinely jaw-dropping.
Best for: Garden trellises, front porch steps, patio string-light setups, window flower box pairings.
4. House-Shaped Lantern Trio
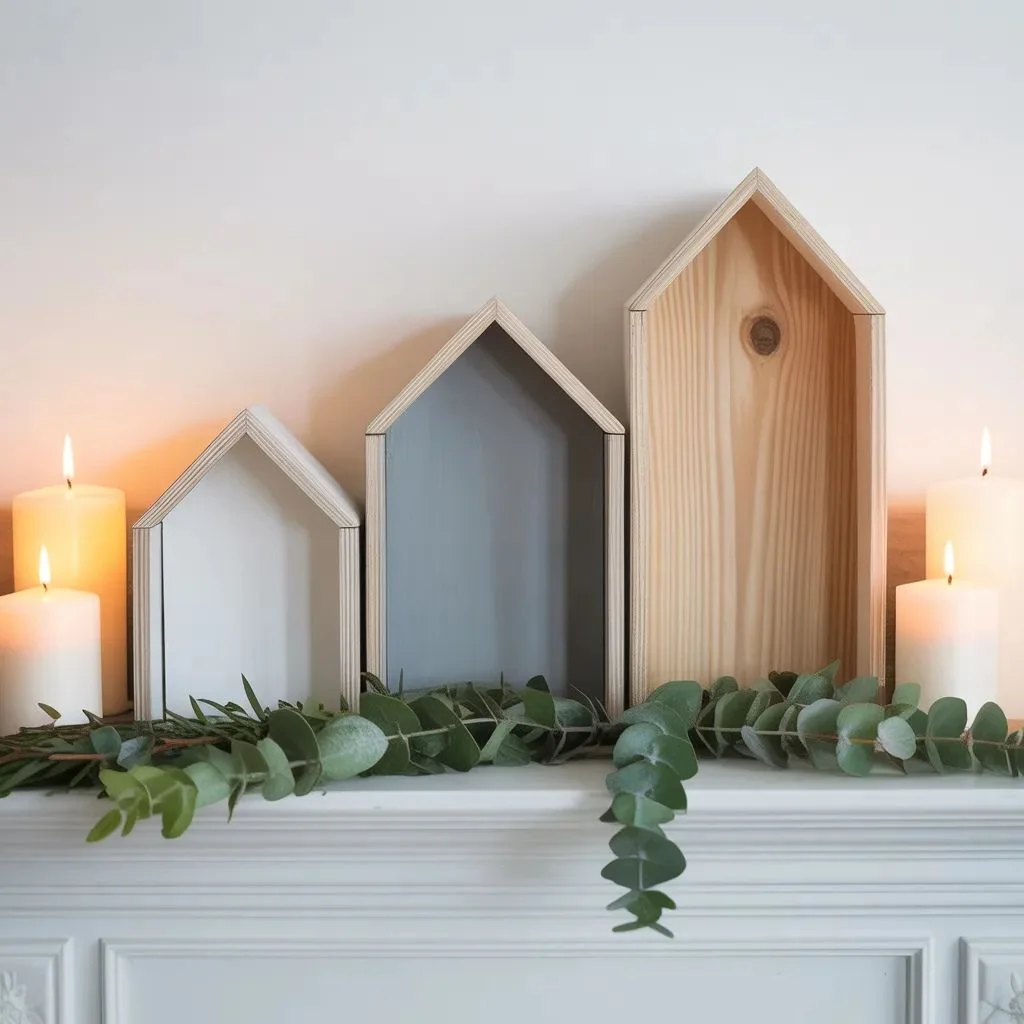
A trio of house-shaped wooden lanterns at varying heights creates one of the most charming mantle or entryway displays you’ll find in any DIY wood lantern ideas roundup. The peaked roofline is achieved with simple 45-degree angled cuts — a miter saw makes this effortless, but a basic miter box will do the job too.
Build three versions in small, medium, and large using the same proportions, then style as a grouped set. Paint them in complementary tones — neutral white, warm grey, and natural wood — for a layered, editorial look. Fill with mini wreaths, ornament clusters, or a single taper candle to style for any season.
Styling tip: Vary the finishes across your trio (natural, painted, stained) for maximum visual interest.
5. Tall Pillar Lantern with Stacked Base
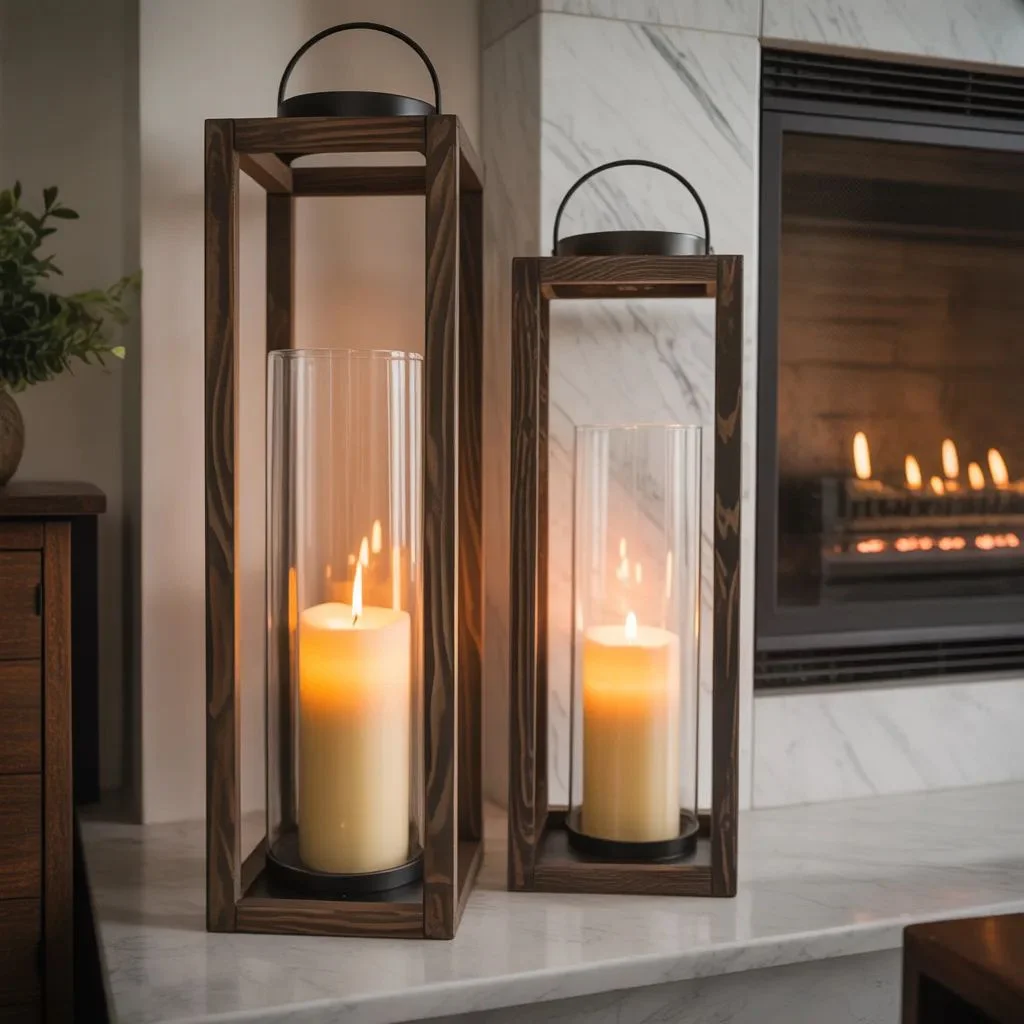
For a dramatic statement piece, the tall pillar lantern is hard to beat. DIY wood lantern ideas don’t usually come with this kind of visual presence, but this one earns it. A tall, narrow frame — around 18 to 24 inches high — balanced on a chunky stacked-block base has an almost architectural quality that works in modern and farmhouse interiors alike.
Use 2×2 boards for the frame and progressively smaller square blocks for the tiered base. Stain everything in a consistent dark walnut, then drop in a tall glass hurricane with a pillar candle inside for a polished hotel-lobby finish. Pair two of these flanking a fireplace for a seriously impactful look.
6. Beachy Driftwood Lantern
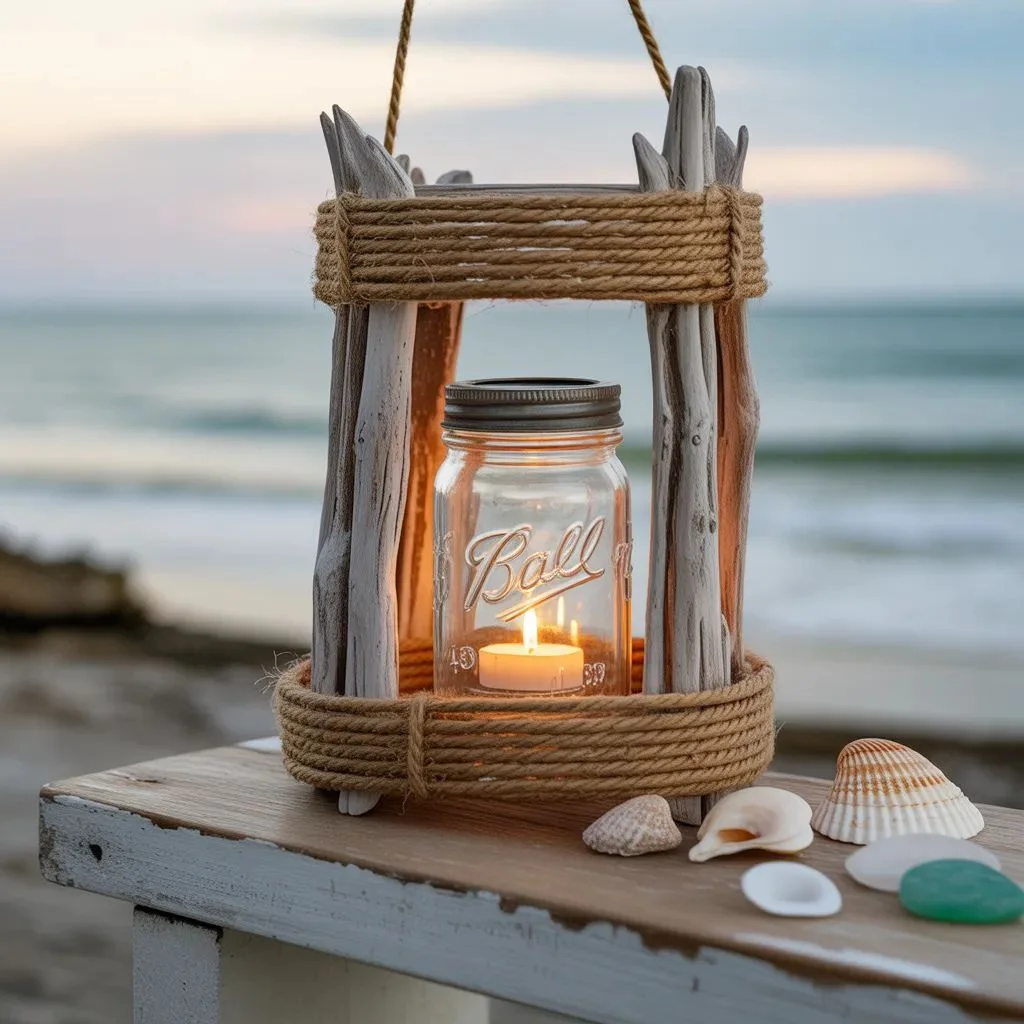
If you prefer coastal or boho-inspired decor, this driftwood DIY wood lantern idea is your weekend project. Instead of precision-cut boards, this design uses mismatched, naturally weathered pieces of driftwood or unprocessed branches assembled into a loosely structured cage lantern. The result is organic, textured, and completely unique.
Hot glue or lash the driftwood pieces together with natural jute twine. Leave the wood completely untreated to preserve its weathered grey colour or apply a whitewash for a bleached-beach aesthetic. A small Mason jar with a tealight sits beautifully in the centre. This one requires zero power tools — just driftwood, glue, and creativity.
Best for: Bathroom shelves, coastal-themed patios, boho bedroom vignettes.
7. Modern Walnut-Stained Geometric Lantern
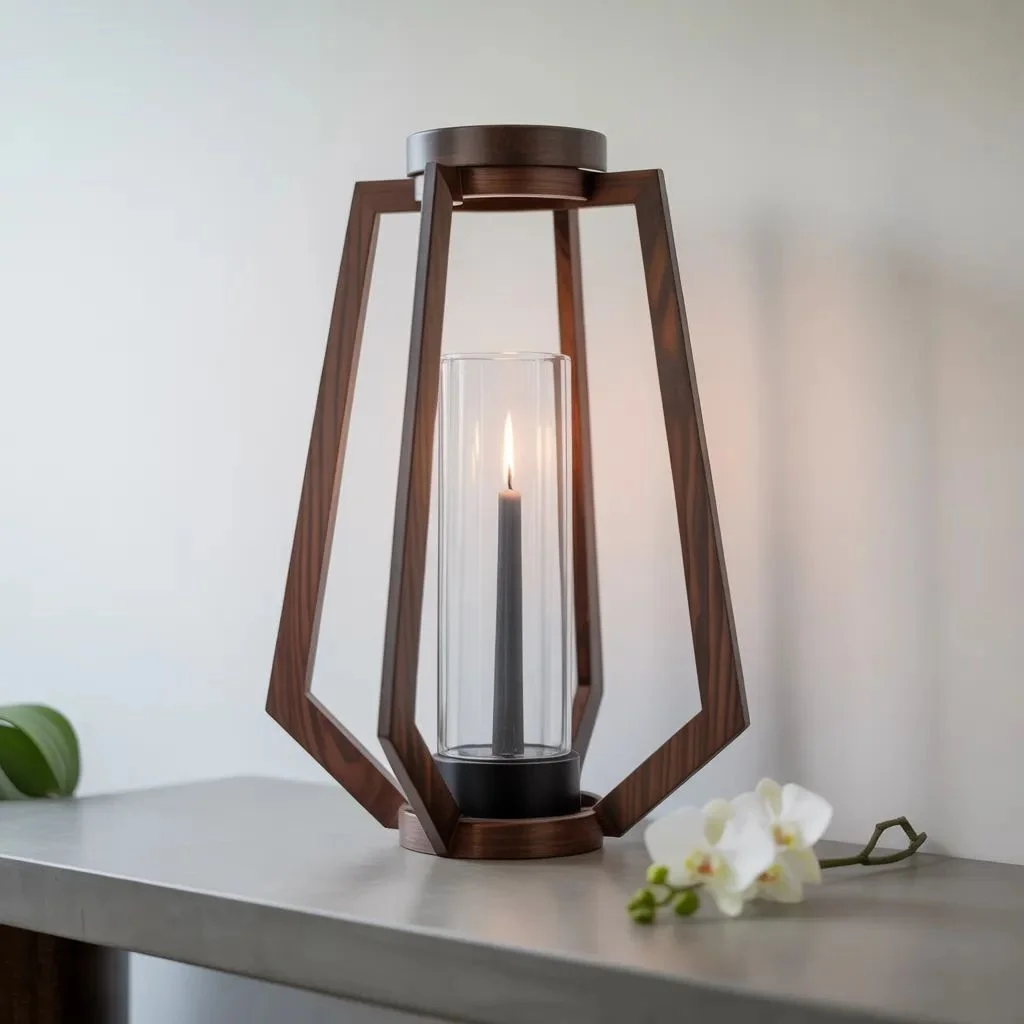
Not every DIY wood lantern has to lean rustic. This geometric version — built with clean, precise lines and finished in a deep walnut stain — suits contemporary, mid-century modern, and Japandi-inspired interiors. The key is precision: accurate cuts and flush-joined corners are what separate this from the rustic builds.
Use select pine or actual walnut timber for the frame. Keep all cuts perfectly square, fill any small gaps with wood filler before staining, and finish with a satin lacquer rather than matte for a more polished look. Pair with a cylindrical glass insert for clean, modern elegance.
Interior fit: Modern, Japandi, Scandi, transitional — anywhere clean lines and natural materials coexist.
8. Pallet Wood Lantern
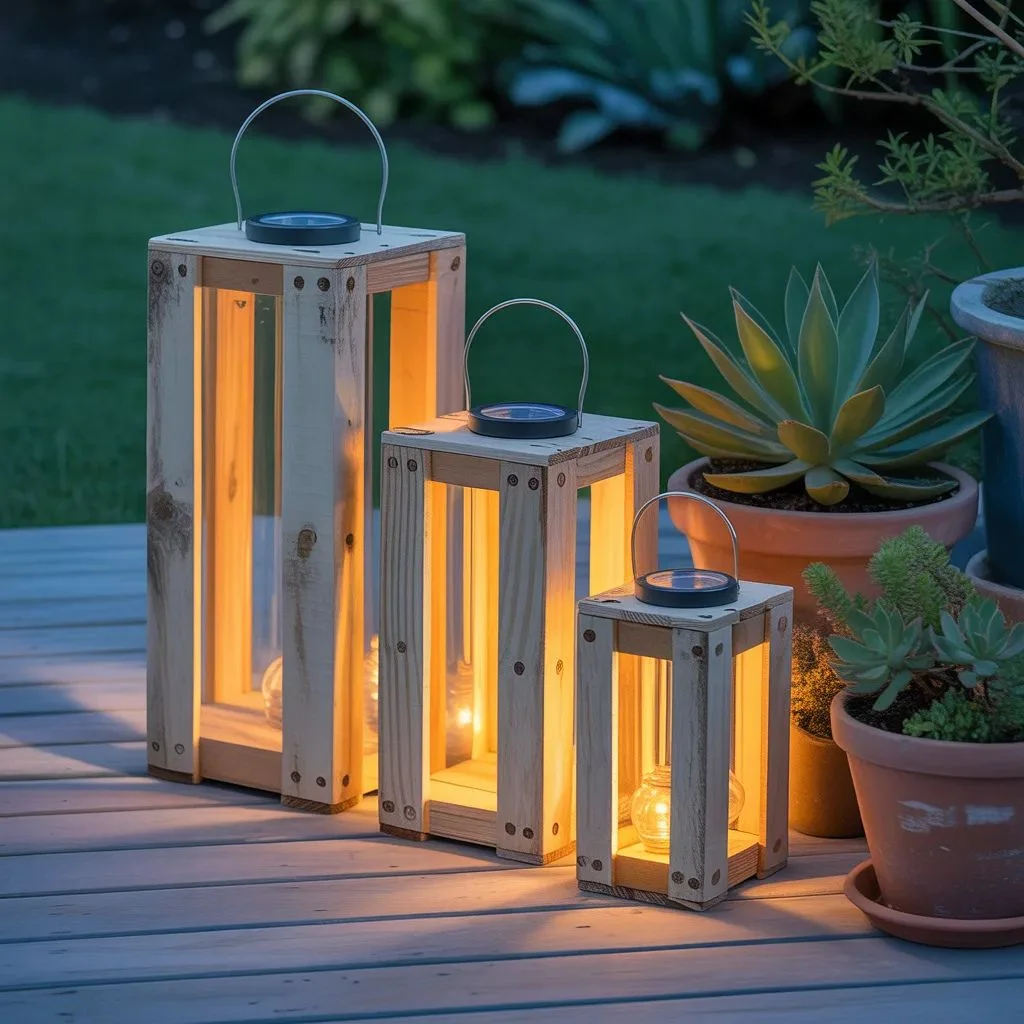
Pallet wood is everywhere, and this DIY wood lantern idea puts it to spectacular use. The rough, reclaimed character of pallet timber gives these lanterns an instant industrial farmhouse feel without any effort. Disassemble a standard pallet, select the most characterful boards, and build a simple four-sided frame with a flat-top cap.
Don’t try to hide the nail holes or weathered marks — they’re part of the appeal. Sand lightly, apply a clear wax or oil finish to bring the grain to life, and let the wood do the talking. These look brilliant grouped in threes on a wooden deck, or as single statement pieces beside a front door.
Cost: Often completely free if you source pallets from local businesses or construction sites.
9. Chunky Farmhouse Centrepiece Lantern
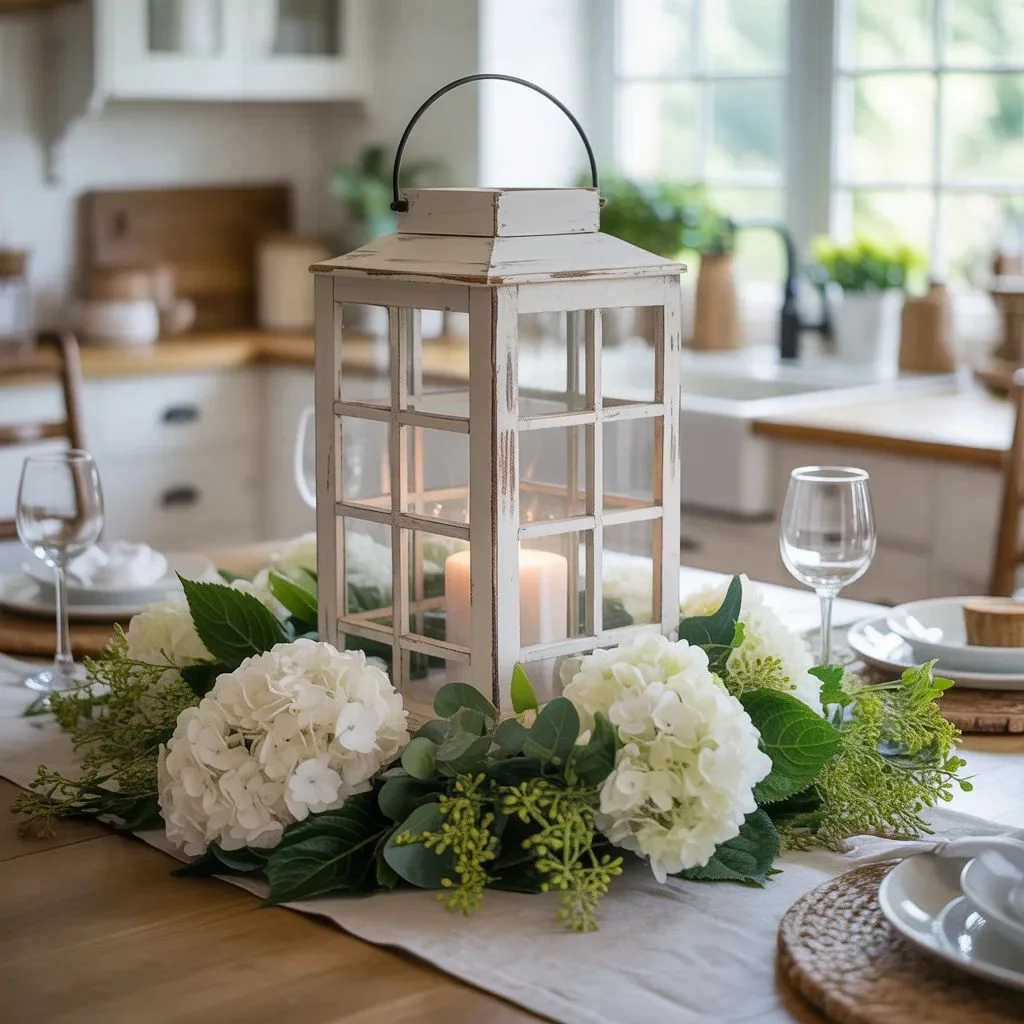
This is the DIY wood lantern that makes everyone ask where you bought it. Built with thicker 1×4 or 1×6 boards instead of the usual 2×2 slats, the chunky farmhouse centrepiece has real weight and presence. It works beautifully as a dining table focal point, especially when filled with seasonal fillers and surrounded by smaller decor elements.
The construction is almost identical to the classic frame lantern, just with wider boards. This creates enclosed side panels rather than an open-slat look — more like a traditional lantern box. Cut four panels to size, join at the corners with wood glue and pocket screws, add a rooftop block assembly, and finish in a warm cream chalk paint with light distressing at the edges.
Seasonal fillers: Spring florals, summer citrus and herbs, autumn pumpkins and dried leaves, winter pine and ornaments.
10. Hanging Rope-and-Wood Lantern
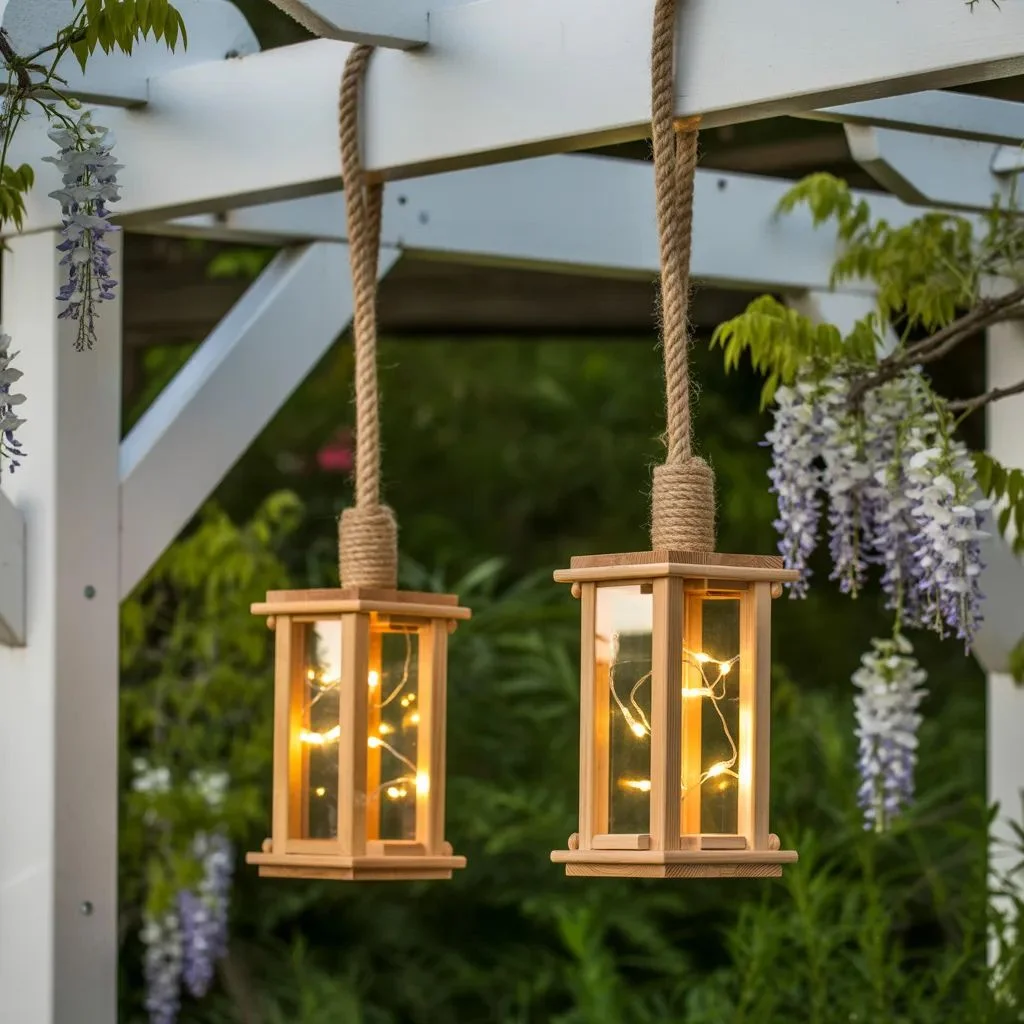
Take your DIY wood lantern ideas vertical with this hanging rope-and-wood design. The lantern frame itself is built using the same basic techniques as earlier designs, but pre-drilled holes at the top four corners allow thick natural rope to thread through and knot underneath — creating a hanging feature that works from pergolas, porch ceilings, and bedroom hooks alike.
Use a 3/4-inch natural sisal or manila rope for a coastal feel or go with a blackened cotton rope for an industrial-boho aesthetic. The hanging version works especially well with a solar light fitted inside, eliminating any need for electrical wiring. Make them in pairs for symmetrical porch lighting that looks like it came straight from an artisan market.
11. Seasonal Interchangeable Lantern
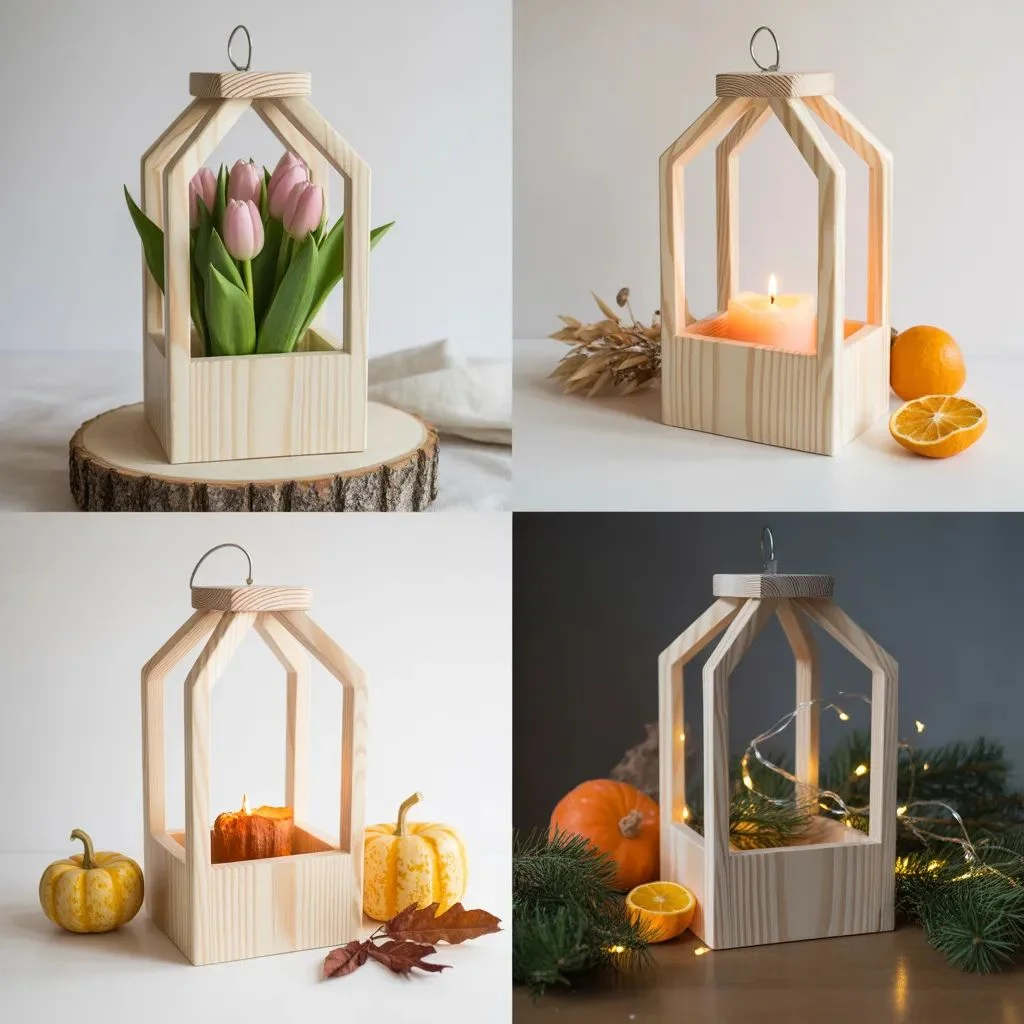
The smartest DIY wood lantern idea on this list is also one of the simplest: build one great lantern, then style it differently for every season. The lantern itself — a classic open-frame design with a wide top opening — serves as a permanent piece of decor. What you put inside changes with the calendar.
Build your frame in a neutral finish (natural pine or light grey) that won’t compete with seasonal fillers. Then rotate through the year: spring brings a small bud vase with tulips; summer calls for citrus slices and a pillar candle; autumn is all about mini pumpkins and dried orange garlands; and winter deserves pine branches, cinnamon sticks, and a string of warm fairy lights.
Value proposition: One weekend build, four seasons of decor. The most cost-effective DIY wood lantern investment you can make.
12. Wedding Centrepiece Lantern Cluster
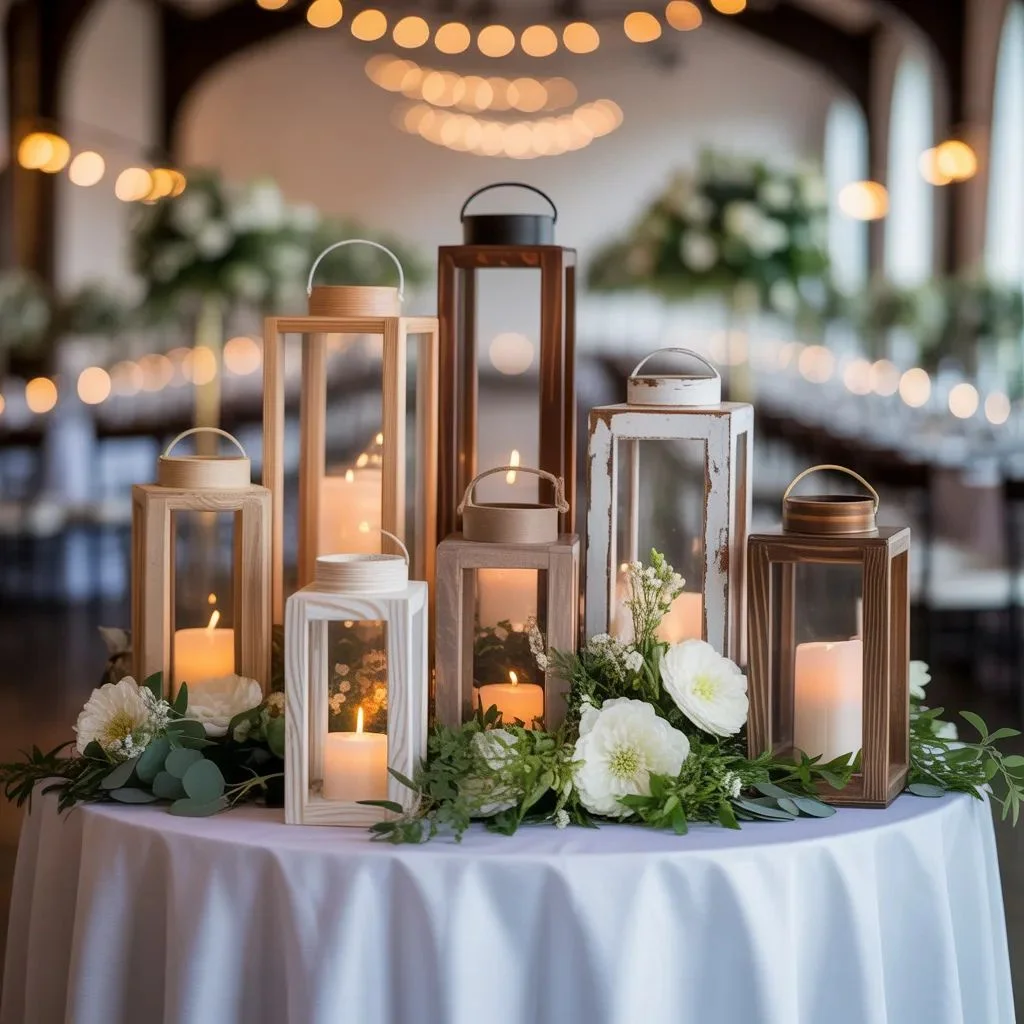
Finally, one of the most popular DIY wood lantern ideas for anyone planning a wedding, shower, or large event: a clustered centrepiece display of lanterns at varying heights. Build five to seven lanterns in two or three different sizes, finish them all consistently (matching stain or matching paint), and group them together as a table centrepiece installation.
Fill each lantern differently — one with a tall taper candle, one with a bud vase and greenery, one with moss and air plants, one with fairy lights — for an organic, layered look. Wood centrepieces are reusable after the event and can be resold, gifted, or kept for home decor. At scale, the cost per centrepiece is remarkably low.
Event applications: Weddings, baby showers, bridal showers, dinner parties, holiday tablescapes.
Finishing Touches: How to Style Your Lanterns
Building the lantern is only half the project. How you style and finish it determines whether it looks like a craft project or a designer piece. Here are the styling principles that make the biggest difference:
Stain vs. Paint
Stain brings out the natural wood grain and suits rustic, farmhouse, Japandi, and organic aesthetics. Paint (especially chalk paint) creates a more finished, opaque look that works well for modern farmhouse, coastal, and maximalist styles. Both are valid — choose based on your interior’s existing palette.
Layering and Grouping
A single lantern is lovely. Three lanterns at different heights is a statement. Always group in odd numbers — threes and fives create natural visual balance. Vary heights, sizes, or finishes within your group for the most dynamic result.
What to Put Inside
- Flameless pillar candles with a remote control (the most practical option)
- Tall glass hurricanes with real candles for outdoor, breezy spaces
- Solar light globes for no-power outdoor placement
- Small bud vases with single-stem flowers or trailing greenery
- Holiday trinkets, ornaments, pinecones, and seasonal foliage
- Fairy lights or Edison bulb strands coiled inside
The Topcoat Rule
Always seal your finished lantern. Matte polyurethane for an understated, natural look. Satin lacquer for a modern, polished finish. Clear wax for chalk-painted lanterns — it protects the paint without adding any sheen.
One Weekend. Twelve Ideas. Zero Excuses.
The best thing about DIY wood lantern ideas is how accessible they are. You don’t need a professional workshop, a full set of power tools, or even a significant materials budget. Most of these projects cost less than the price of a single store-bought lantern — and they result in something far more personal, more beautiful, and more satisfying.
Whether you start with a simple scrap wood rustic lantern this Saturday, or go all-in on a full wedding centrepiece cluster, the process is the same: cut, glue, nail, sand, stain, and style. Build one, build three, build a dozen. Your home — and your guests — will notice.
Ready to start building? Pin your favourite design above, gather your supplies, and clear a corner of your garage. Your weekend project is waiting.
Our Pick: Courtyard Wall Designs That Turn Every Outdoor Corner Into a Statement.